React Native for Vega: Recreating Apple & Google Photos in RN — Part 3
 Bartłomiej Bukowski•Nov 4, 2025•11 min read
Welcome to the third part of our Apple Photos series, where we’ll take a closer look at building a multiplatform photo gallery. Previously, we showed you how to create a gallery app that runs smoothly across mobile, TV, and web using React Native.
This time, we’re pushing the challenge further by developing for Amazon’s next-generation devices with the Vega platform.
About Vega
React Native for Vega is a just-released React Native platform designed specifically to support app development on Amazon’s Vega OS. It’s currently based on React Native 0.72 and supports the New Architecture, including Fabric and TurboModules. The main idea behind the platform is to integrate React Native at the operating system level instead of packing it with the app itself. This makes it possible to reduce the app size, thus improving startup time.
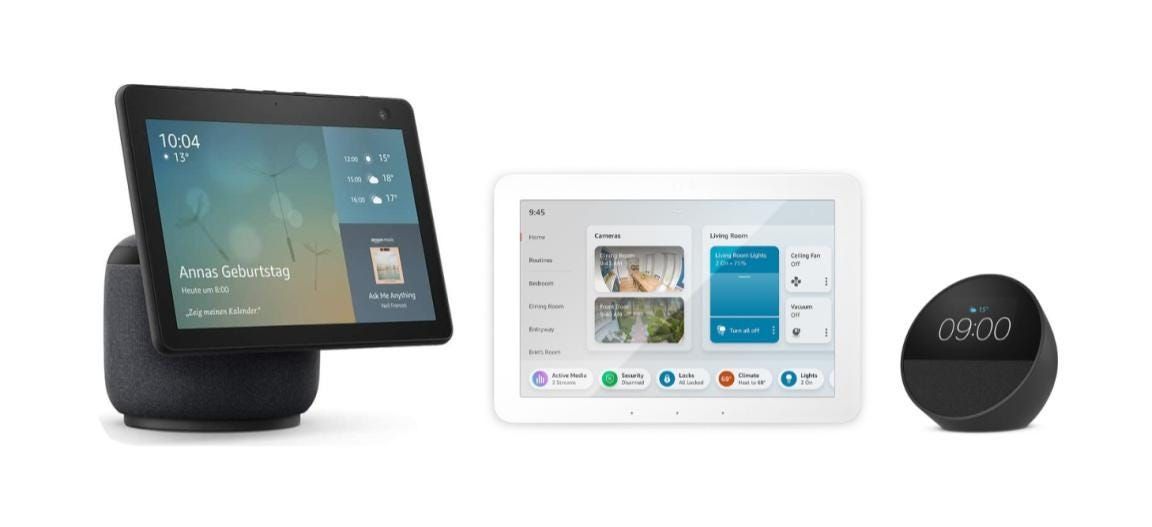
Using the Vega platform opens the door to creating apps for Amazon’s next-generation devices, including:
- Echo Show series
- Echo Hub series
- Echo Spot series
- Next-gen Fire TV
Developing for the Vega platform is definitely made easier with the Vega developer tools. It’s a suite of development and testing tools aiming to simplify workflows and accelerate the build process. The table below covers the most important tools of the Vega developer tools:
- Vega Libraries — a set of third-party library implementations compatible with Vega,
- Vega Studio — a VS Code extension that automates building & running Vega apps,
- Vega CLI — a command tool to build an app & work with device / simulator,
- VDA — a command line utility for handling Vega app’s binaries,
- Vega Virtual Device — a simulator that lets you test Vega apps without a physical device.
You can find more information in the official Amazon’s documentation.
Building a Vega app
Before diving into adding Vega support to our multiplatform Photos gallery app, let’s quickly go over what’s required to build and run an app on Vega.
Project template
The easiest way to start a Vega project is by using the Vega CLI to generate a project template. Each template includes essential configuration files that you can customize to suit your app’s specific needs.
kepler project list-templates # Lists available templates

kepler project generate \
  --template `<TEMPLATE>` \
  --name `<APPNAME>` \
  --outputDir `<OUTPUTDIR>`
Workflow
Vega apps need to be built using React Native’s bare workflow. This workflow gives developers full control over the app’s configuration and build process, exposing the native project structure, but it also requires manual setup. Unlike managed workflows like Expo, the bare workflow doesn’t abstract platform-specific settings; something essential when integrating with system-level components, as in the case of Vega apps.
To handle bundling and code transformation in the bare workflow, we use Metro and Babel. If you’re building exclusively for Vega, the minimal configuration generated from the template is usually sufficient, relying on the default setup from @react-native/metro-config. However, if you want to build an app with support for other platforms, additional steps are necessary — more on that later.
Configuration
To begin with, Vega and developer tools require a manifest.toml file to recognize and properly install the application. This file contains app’s metadata, as well as requested system capabilities. When building a Vega app, the manifest file is organized into sections, with the most important being:
schema-version: required, schema version used in the manifest file,[package]: required, metadata of the package (app) — including id, title and icon,[components]: required, declares the components bundled into the package. Components can be either interactive, service or task. Each app which isn’t a library-only package and/or displays graphical content, should declare an interactive component,[needs]/[wants]: optional, specifies the system capabilities the app requires or can use optionally to function properly on a Vega device.
The code below shows an example manifest file from our Photos gallery app:
# manifest.toml
schema-version = 1

[package]
title = "SWM Photos Gallery app for Vega"
version = "1.0.0"
id = "com.swmansion.photos"
icon = "@image/vega-icon.png"

[components]
[[components.interactive]]
id = "com.swmansion.photos.main"
runtime-module = "/com.amazon.kepler.keplerscript.runtime.loader_2@IKeplerScript_2_0"
launch-type = "singleton"
categories = ["com.amazon.category.main"]
For a full description of the manifest file configuration, please visit the official documentation.
In addition to that, you should also configure your package.json file by providing essential build intrinsics, as well as used libraries. Vega comes with its own, native implementations of the most popular React Native, Expo and community libraries, which should be used to ensure compatibility with the platform. Each of the Vega-specific implementations is preceded with @amzn scope prefix. You can explore all available libraries and packages here.
The code below shows a minimal configuration of Vega build properties and libraries in package.json. You can find the full configuration in our repository.
# package.json
{
  "dependencies": {
    "@amzn/react-native-kepler": "~2.0.0",
    "@amzn/react-native-reanimated": "~2.0.0",
    "react": "18.2.0",
    "react-native": "0.72.0",
  },
  "kepler": {
    "projectType": "application",
    "appName": "SWMPhotos",
    "targets": ["tv"],
  }
}
Development
Development in Vega is fairly straightforward. Since it’s based on React Native 0.72, creating an app mostly follows the usual React Native workflow.
Vega, however, differs from standard React Native in its approach to focus management, offering support for both remote controllers and voice navigation features. It:
- Adopts focus management techniques known from
react-native-tvosfork, such as such as thenextFocusUp,nextFocusDown,nextFocusLeft, andnextFocusRightprops to enhance directional control, - Introduces specialized
FocusManagerturbo module featuring an imperative API for focus management, with methods such assetNextFocus()orclearNextFocus(), - Integrates ARIA (Accessible Rich Internet Applications) features with Alexa voice control to allow voice-guided on-screen navigation through props such as
aria-labelandalexaEntityType.
For more details on Vega navigation, see the Vega developer guides in the official Amazon documentation.

Another key difference in Vega is its file system model: apps run in a sandboxed environment with /pkg as the root and limited access beyond it. You can learn more about the Vega file system in the API documentation.
Build and run
Unlike standard React Native, a Vega app must first be built and packaged into a .vpkg binary archive. This can be done using the build-kepler command:
# Get available build targets
kepler build help

# Build the app for given target
npx react-native build-kepler \
  --build-type `<Debug/Release>` \
  --target `<BUILD_TARGET>`
This produces a .vpkg binary in the local build directory, with a relative path depending on a given build type and target (typically ./build/<TARGET>-<BUILD_TYPE>/<PACKAGE_NAME>_<TARGET>.vpkg).
Next step is to install the package on the Vega device or simulator, which can be done using Vega CLI:
# List all connected Vega devices and simulators
kepler device list

# Install the package on selected device
kepler device install-app \
  -p `<PATH_TO_VPKG>`
  --device `<DEVICE_NAME>`
To launch the app on the selected device, you can use the launch-app command and specify the interactive component ID (the one from manifest.toml file):
kepler device launch-app \
  --device <DEVICE_NAME> \
  --appName `<INTERACTIVE_ID>`
For the Photos Gallery app, we created a Bun script that automates the entire process, letting us build and run the app with a single command. You can check the implementation here.
Cross-platform integration
Since Vega comes with its unique environment and build process, integrating it with an existing app designed to support other platforms raises additional challenges, from configuration to design aspects. In the following sections, we’ll walk through adding Vega support to an existing multiplatform React Native app, using our Photos Gallery app (which already supports Android, iOS, TVs, and the web) as an example.
Project structure
In our project, we use a monorepo setup — a single repository for all code and assets across builds. To manage the workflow and configuration differences for Vega, we recommend creating a separate subdirectory for the Vega build. This directory should contain the configuration files mentioned in the previous chapter of the article, either created manually or generated from existing project templates. Below is a simplified project structure from our repository:
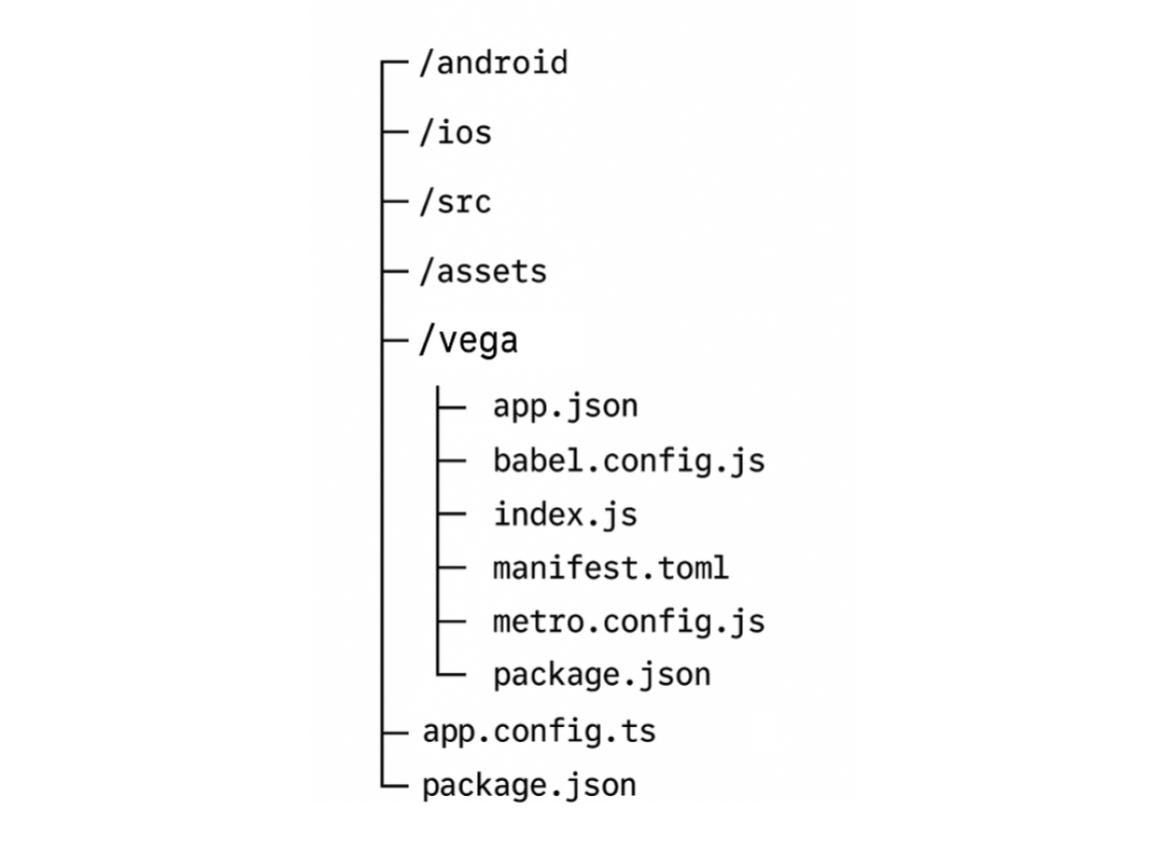
As you can see, there is only one global source code directory, outside the ./vega location. This means that each source file must be resolved from the external directory to ensure a proper build process.
Resolving external source files
To address the issue mentioned earlier, it’s essential to properly configure the Metro resolver, including:
- Adding the source (and assets) directory to Metro’s
watchFoldersto specify where it should look for additional files to resolve, - (Optional) Adding local node modules to Metro’s
resolverto explicitly tell Metro where to search for libraries and packages, - Disabling hierarchical lookup to prevent Metro from resolving unnecessary configuration files or node modules from the parent Expo workflow directory.
Here’s an example Metro configuration that covers all the steps we’ve discussed:
// vega/metro.config.js
const path = require("path");

const config = {
  watchFolders: [
    path.resolve(__dirname, "../src"),
    path.resolve(__dirname, "../assets")
  ],
  resolver: {
    nodeModulesPaths: [path.resolve(__dirname, "node_modules")],
    disableHierarchicalLookup: true
  }
};

module.exports = mergeConfig(getDefaultConfig(__dirname), config);
Managing package variants
As mentioned in the configuration part, Vega comes with its own implementation of popular React Native & Expo libraries, all preceded with @amzn prefix. To handle imports cleanly without modifying the source code, we use Babel aliases in the Vega build, as shown in the example below:
// vega/babel.config.js
const path = require("path");

module.exports = {
  presets: ["module:metro-react-native-babel-preset"],
  plugins: [
    ["module-resolver", {
      root: ["../src"],
      alias: {
        "@": "../src",
        "expo-image": path.resolve(__dirname, "node_modules",
                                   "@amzn/expo-image"),
        "react-native-mmkv": path.resolve(__dirname, "node_modules",
                                          "@amzn/react-native-mmkv"),
      },
    }],
  ],
};
Note that we also configure the @ symbol to resolve to the source code root.
The full Babel configuration is available in our repository.
Library compatibility
While Vega supports most commonly used libraries, a few are either unsupported or only partially supported. In our project, we found four packages that needed modifications or complete replacements due to incompatibility with Vega’s implementations:
expo-image— missing support for.svgfiles; partially replaced withreact-native-svg,expo-image-manipulator— implemented as a legacy version; it requires the use of a legacy API,expo-media-library— currently doesn’t support Vega; replaced withexpo-file-system,expo-router— currently doesn’t support Vega; replaced withreact-navigation.
To address these issues with minimal code changes, we took a TV-like approach: introducing the .kpl extension for Vega-specific files and configuring Metro to resolve them in the correct order, as shown in the example below:
// vega/metro.config.js
const config = {
  // ...other configs...
  resolver: {
    // ...other configs...
    sourceExts: [
      ...(defaultConfig.resolver.sourceExts || []).map((ext) =>
       `kpl.${ext}`),
      ...(defaultConfig.resolver.sourceExts || []),
    ],
  },
};
By prioritizing the .kpl extension, Metro resolves .kpl files before standard ones, allowing Vega-specific code to remain in separate files for easier development and maintenance, without affecting the code for other platforms.
Now, we‘ll briefly review the solutions applied to each of the previously mentioned packages.
Loading SVG files
Instead of loading SVG images directly with the <ExpoImage /> component, we created a wrapper component: <SvgImage />. Using our file resolution approach, it behaves differently on Vega, reading SVGs as strings via expo-file-system and rendering them with <SvgXml /> from the react-native-svg package. On other platforms, we still use <ExpoImage />.
Image manipulation
To fix the incompatible expo-image-manipulator version issue, we simply created a separate implementation within the appropriate .kpl file. This Vega-specific implementation uses a legacy manipulateAsync() function, which serves as the interface for the Vega-supported image manipulator version.
Media library
Since Vega currently doesn’t provide support for expo-media-library, we added a separate, Vega-specific code, which uses bare expo-file-system to mimic the behavior of the media library. We implemented basic logic for filtering image and media files, as shown in the example below:
// useMediaLibraryPhotos.kpl.ts
import * as FileSystem from "expo-file-system"

// ...other code...
const PHOTOS_DIR = "/pkg/assets/photos";
const IMAGE_EXT = ["jpg", "jpeg", "png", "webp"];

const entries = await FileSystem.readDirectoryAsync(PHOTOS_DIR);
const images = entries.filter(name => {
  const ext = name.split('.').pop()?.toLowerCase();
  return !!ext && IMAGE_EXT.includes(ext);
});
// ...other code...
To populate a device with photos, the images are packaged with the app binaries during the build and deployed to the device, where they become available at /pkg/assets inside the Vega sandbox. To automate this, we added the functionality to our installation script.
Navigation
Similar to our earlier solutions, we replaced the unsupported expo-router with react-navigation components inside the .kpl files, following the same wrapper pattern used for loading SVG images. You can check the implementations by exploring the navigation tab of our code base.
Build and run
To build the app for Vega, navigate to the /vega subdirectory and follow the instructions outlined in the previous build and run section of this article.
The takeaway
With Vega, you can take React Native’s multiplatform capabilities even further, reaching a new generation of Amazon smart devices with remote control, voice navigation, and many more upcoming features. This article aims to provide all the essential knowledge to get started with Vega development and build multifunctional apps, using our Photos Gallery example as a guide.
If you’d like to try out our app, check out the code repository and explore it on your Vega device. We’d love for you to share your insights and join us on the journey of expanding what’s possible with React Native!
Need help with your Vega app or want to develop a new app? You can always reach out to us at projects@swmansion.com. As the official Vega-supported agency and a long-time Amazon partner, we’ll be happy to use our first-hand experience to help you!
We’re Software Mansion: multimedia experts, AI explorers, React Native core contributors, community builders, and software development consultants.