
Setting up GitHub SSH Key on Expo EAS
 Patryk Mleczek•Oct 27, 2025•17 min read
Using HTTPS with GitHub (or other Git provider) is a simple way for cloning publicly available repositories. But if we try to push changes to a private repo using HTTPS, Git will prompt us for a password every time, so this doesn’t really work on CI.
Expo allows us to link an account with GitHub, which enables us to connect to specific repositories and perform various interactions with them, such as triggering EAS builds from PRs or starting new builds whenever a push is made in the repo. More information about it can be found at: https://docs.expo.dev/tutorial/eas/using-github/.
While that integration covers many common flows, there are still some cases like resolving Git submodules or performing operations on repositories we don’t want to or can’t connect to Expo, that will require the SSH key setup. In this tutorial, we’ll analyze an example of such a case and learn how to set up an SSH key in the EAS cloud environment.
Note: This article will only focus on setting up access to GitHub, but the steps should be the same (or very similar) for other Git providers.
Initializing the project
Let’s initialize an Expo project named ExampleApp with create-expo-app:
npx create-expo-app@latest ExampleAppAnd configure EAS Build for it by running:
eas build:configure(You can learn more about EAS Build here.)
The eas.json added by EAS CLI by default contains three build profiles:
{
  …
  "build": {
    "development": {
      "developmentClient": true,
      "distribution": "internal"
    },
    "preview": {
      "distribution": "internal"
    },
    "production": {}
  },
  …
}
We can quickly verify that EAS builds for pass locally:
eas build -p android -e development --local[RUN_GRADLEW] BUILD SUCCESSFUL in 3m 59s
[RUN_GRADLEW] 446 actionable tasks: 446 executed
[UPLOAD_APPLICATION_ARCHIVE] Application archives:
[UPLOAD_APPLICATION_ARCHIVE] - /var/folders/ww/0sybn_q92gd5v0k1dm2lby8c0000gn/T/eas-build-local-nodejs/108cf860–3e5c-4ebf-8007–1f4366d52826/build/android/app/build/outputs/apk/debug/app-debug.apk (196 MB)
[UPLOAD_APPLICATION_ARCHIVE] Uploading application archive…
[PREPARE_ARTIFACTS] Preparing artifacts
[PREPARE_ARTIFACTS] Writing artifacts to /Users/patrykmleczek/Desktop/ExampleApp/build-1760479135628.apk
Build successful
You can find the build artifacts in /Users/patrykmleczek/Desktop/ExampleApp/build-1760479135628.apkAnd that they also pass on EAS cloud:
eas build -p android -e development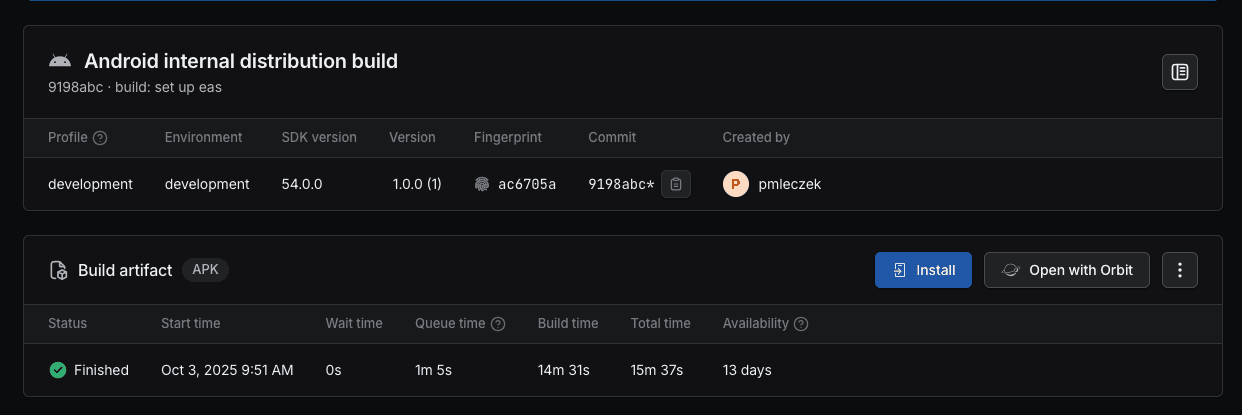
Interacting with private repository
Now, let’s suppose we have a private GitHub repository that we don’t want to or can’t connect to Expo. However, we want to perform a certain side effect each time our app is built. For this tutorial, we can create a new tag in the repository on every EAS build. In a real world scenario we could, for example, publish a new version of the iOS package to SPM or even just upload the built application to the repository.
In order to create a new tag on GitHub, we’ll be cloning the repository to the EAS build workspace, committing some changes and pushing the new tag to the upstream on every build. Thanks to the flexibility of Expo EAS and the built-in support for custom builds, we can easily extend our current setup with the mentioned GitHub repository operations. More information about EAS custom builds can be found here.
Let’s first create a simple bash script that will clone the repository, create a new tag and push it to the upstream. Create scripts directory at the root of the project (if it doesn’t already exist) and add a new file named new-tag.sh with the following contents to it:
#!/bin/bash

GITHUB_REPO_URL="[email protected]:pmleczek/eas-github-ssh-private-repository.git"
GITHUB_REPO_NAME="eas-github-ssh-private-repository"

# Remove the previous checkout
if [[ -d "$GITHUB_REPO_NAME" ]]; then
  echo "Removing previous checkout of $GITHUB_REPO_NAME…"
  rm -rf "$GITHUB_REPO_NAME"
fi

# Clone the repository to the build workspace
git clone $GITHUB_REPO_URL
cd $GITHUB_REPO_NAME || { echo "Can't cd into $GITHUB_REPO_NAME"; exit 1; }

# Write current date and time to time.txt
echo $(date) > time.txt
# Write current EAS build runner to environment.txt
echo $EAS_BUILD_RUNNER > environment.txt

# Push the changes to the upstream
git add -A
git commit -m "Update time.txt and environment.txt"
echo "Pushing the changes to the upstream"
git push

# Decide on the next tag (in semver convention)
NEXT_TAG="1.0.0"
if [[ "$(git tag | wc -l)" -gt "0" ]]; then
  LAST_TAG=$(git tag - sort=-v:refname | head -n 1)
  MAJOR=$(echo "$LAST_TAG" | sed -E 's/v?([0–9]+)\..*/\1/')
  MINOR=$(echo "$LAST_TAG" | sed -E 's/v?[0–9]+\.([0–9]+)\..*/\1/')
  PATCH=$(echo "$LAST_TAG" | sed -E 's/v?[0–9]+\.[0–9]+\.([0–9]+).*/\1/')
  NEXT_PATCH=$((PATCH + 1))
  NEXT_TAG="$MAJOR.$MINOR.$NEXT_PATCH"
fi

# Create and publish new tag
echo "Creating new tag $NEXT_TAG"
git tag $NEXT_TAG -m "EAS Environment: $EAS_BUILD_RUNNER; Date: $(date)"
git push origin $NEXT_TAG

# Cleanup the repository
echo "Cleaning up the checkout of $GITHUB_REPO_NAME…"
cd ..
rm -rf $GITHUB_REPO_NAME
The script will first clone the repository from GitHub to the root of our build workspace. Then, it writes the current date and the value of EAS_BUILD_RUNNER environment variable (either eas-build for EAS cloud builds or local-build-plugin for local builds) to two files and the changes are committed and pushed to the upstream. Tags follow the semver convention and start at 1.0.0. On every update, the patch value will be incremented.
Let’s make sure that our script has correct execution permissions:
chmod +x ./scripts/new-tag.shThe simplest way to embed our script within the build process is to use a build lifecycle hook. A reference for build lifecycle hooks can be found here. As we want to run our script after the build succeeds, we can use the eas-build-on-success hook. Let’s add the following entry to the scripts section in our package.json:
…
"scripts": {
  "eas-build-on-success": "scripts/new-tag.sh",
  "start": "expo start",
…
One important thing about lifecycle hooks is that they’re not executed for custom builds, so if we wanted to define a custom build configuration (for example to avoid building entire app, as we’re not using the build results for the GitHub operations), we would have to call the script explicitly:
# .eas/build/custom-build.yml
build:
 name: Check out project source code
 steps:
   - eas/checkout # Only check out the project files
   - run:
       name: Create new tag in the repository
       command: scripts/new-tag.sh
If we’re using a custom build configuration, we also need to specify it in the eas.json file under the config property of the build profile we want to use:
"build": {
"development": {
"developmentClient": true,
"distribution": "internal",
"config": "custom-build.yml"
},
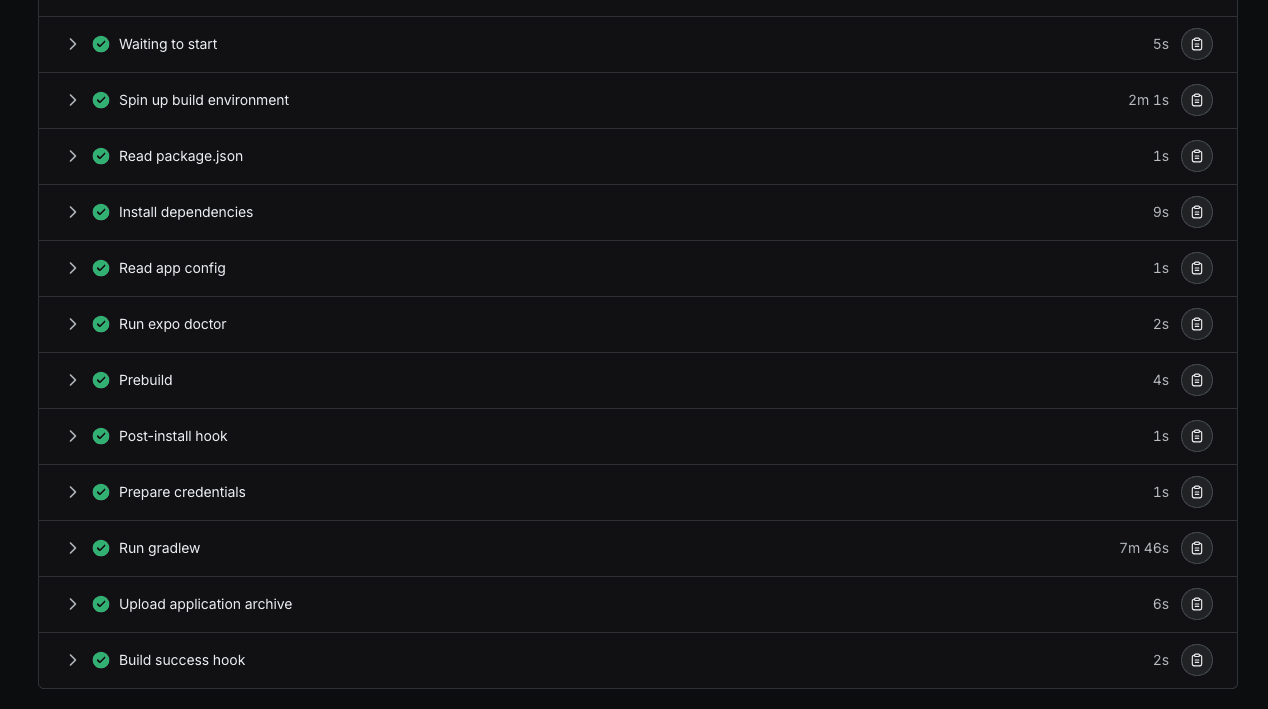
…With the custom build step or hook set up, we can now run the build and verify that all repository operations complete successfully:
eas build -p android -e development --local[Create new tag in the repository] Cloning into 'eas-github-ssh-private-repository'…
[Create new tag in the repository] [main 82d60a5] Update time.txt and environment.txt
[Create new tag in the repository] 2 files changed, 2 insertions(+)
[Create new tag in the repository] create mode 100644 environment.txt
[Create new tag in the repository] create mode 100644 time.txt
[Create new tag in the repository] Pushing the changes to the upstream
[Create new tag in the repository] To github.com:pmleczek/eas-github-ssh-private-repository.git
[Create new tag in the repository] 12c92ec..82d60a5 main -> main
[Create new tag in the repository] Creating new tag 1.0.0
[Create new tag in the repository] To github.com:pmleczek/eas-github-ssh-private-repository.git
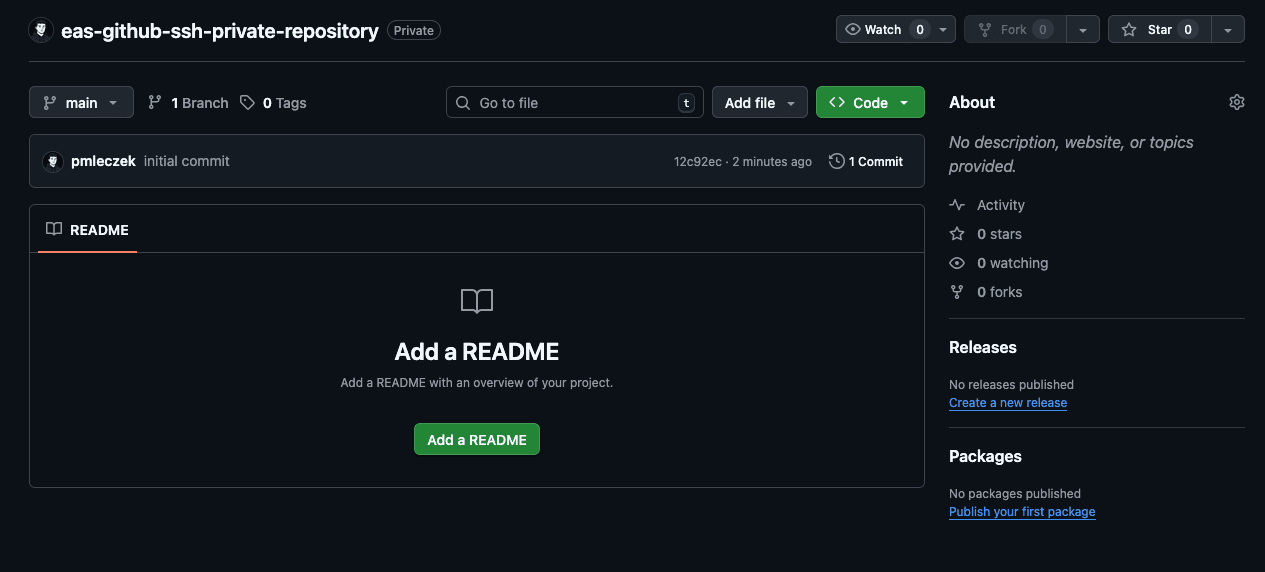
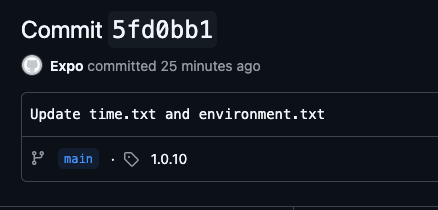
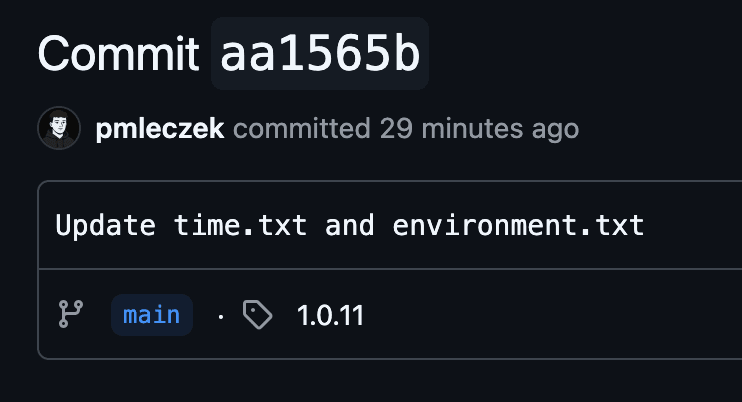
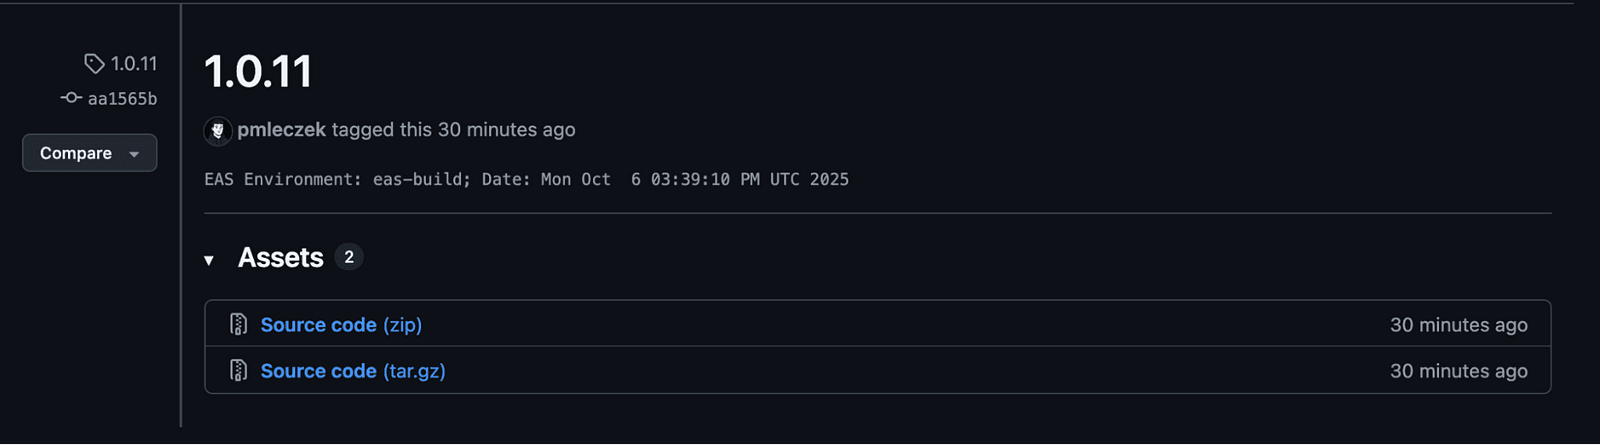
[Create new tag in the repository] * [new tag] 1.0.0 -> 1.0.0We can also see the results in our GitHub repository:

Now, when we know that our script works locally, we can move on to run it on EAS cloud. Let’s execute the build command once again, this time without the--local flag:
eas build -p android -e developmentUnfortunately this time there’s no tag from eas-build environment and when we navigate to our build page at: https://expo.dev, we see that our GitHub operations fail at the very first step: cloning the repository.
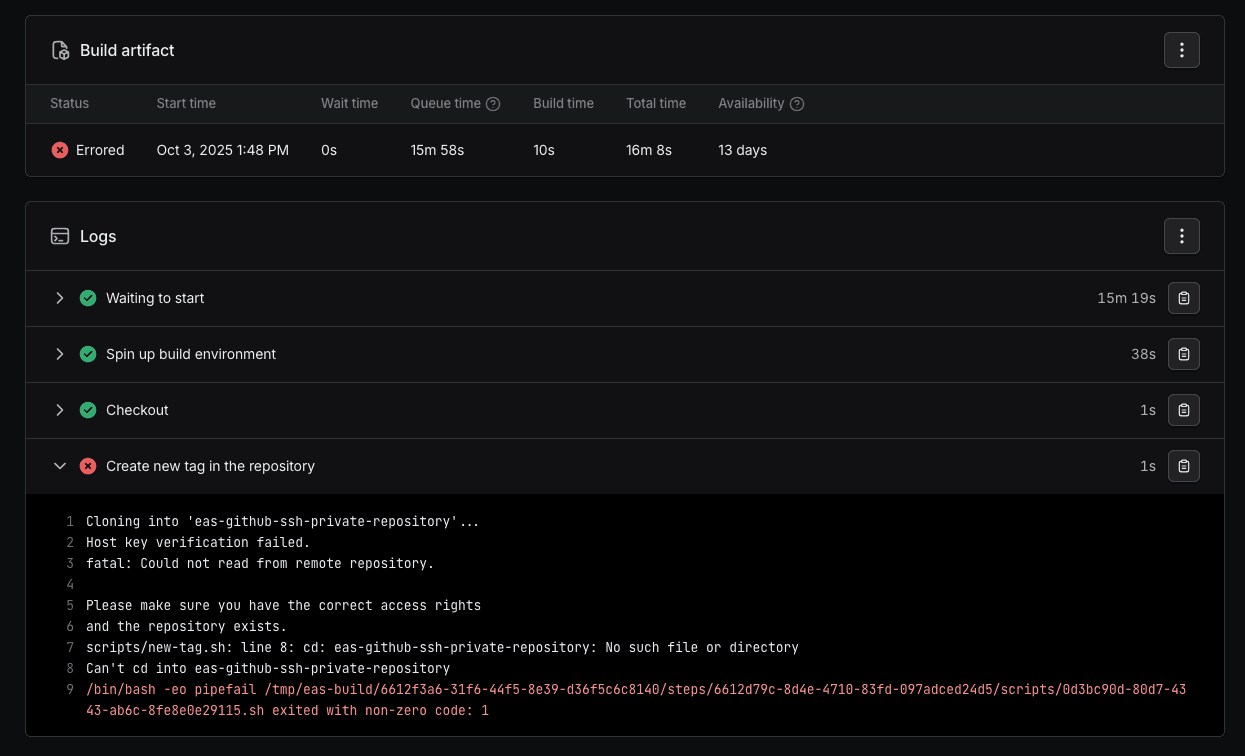
We can see that the authentication fails and we’re unable to access the repository. That’s obviously because, unlike our local setup, the EAS cloud build server doesn’t have SSH access to our GitHub setup.
Adding GitHub SSH key to EAS
Let’s start by creating the SSH key which will be used by both GitHub and EAS. Run the following command on your local machine:
ssh-keygen -t ed25519 -C "eas-access"When prompted for the file where the key should be stored, we can use the suggested path, but suffix it with _eas, since the key will be used only for authentication on EAS. This also makes it easier to overwrite the key if it already exists or reuse the filename for future keys.
Generating public/private ed25519 key pair.
Enter file in which to save the key (/Users/<username>/.ssh/id_ed25519):
/Users/<username>/.ssh/id_ed25519_eas
Then, enter the passphrase of choice and the key should be ready for use. We’ll add the public key to GitHub and the private key to EAS. Let’s start by copying the public key:
cat ~/.ssh/id_ed25519_eas.pub | pbcopyAnd let’s add it to GitHub. Navigate to https://github.com/settings/keys and add the copied public key as a new SSH key. You can select either Authentication or Signing key type according to your needs.
More information about adding SSH keys to your GitHub account can be found here.
Then, let’s add the base64-encoded private key as an environment variable to EAS. Encode the private key with base64 and copy its value:
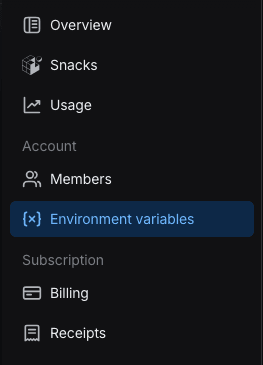
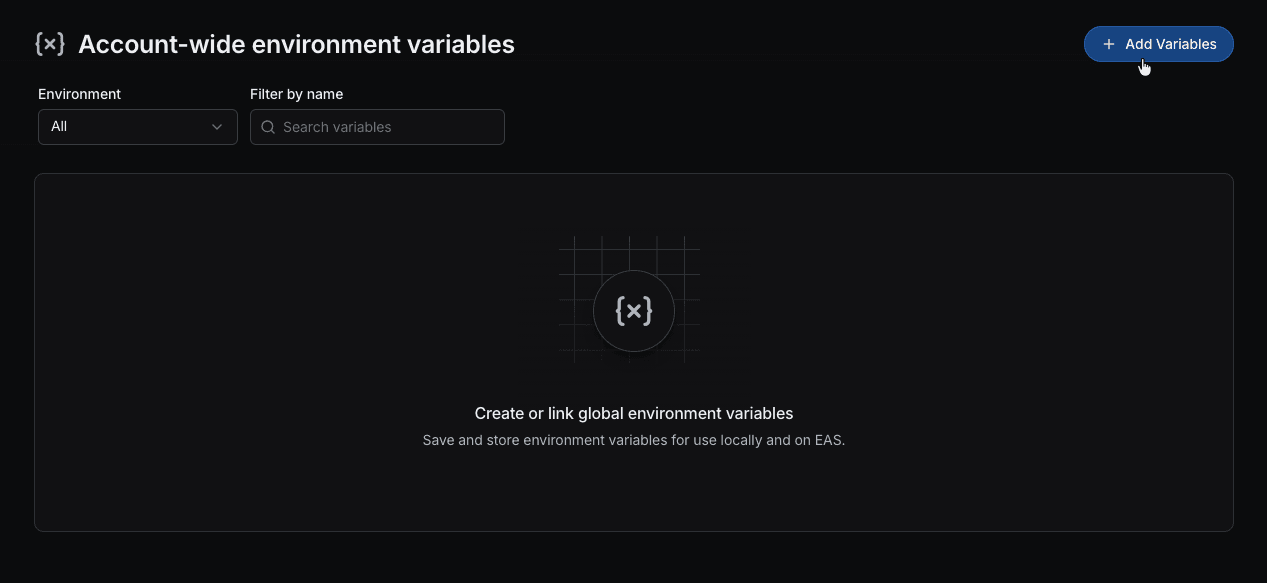
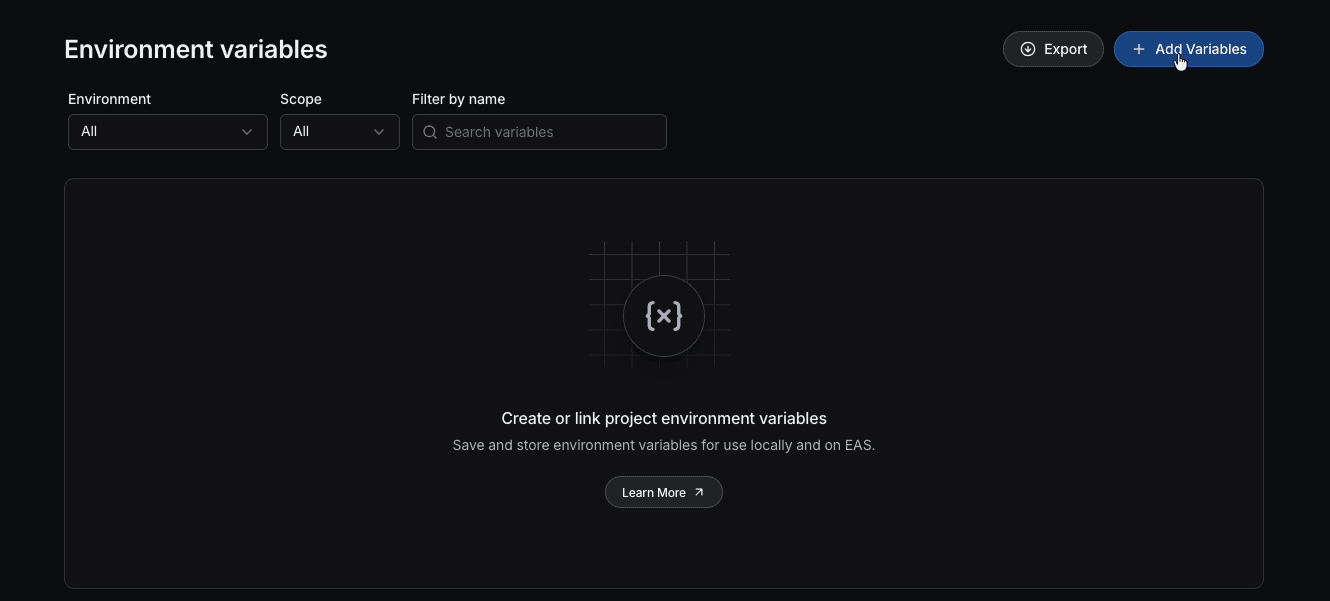
base64 -i ~/.ssh/id_ed25519_eas | pbcopyIf you want to make the key available to all of your Expo projects, add it as an account-wide environment variable. Navigate to the Account > Environment variables page:
And click + Add Variables to add new global variables:
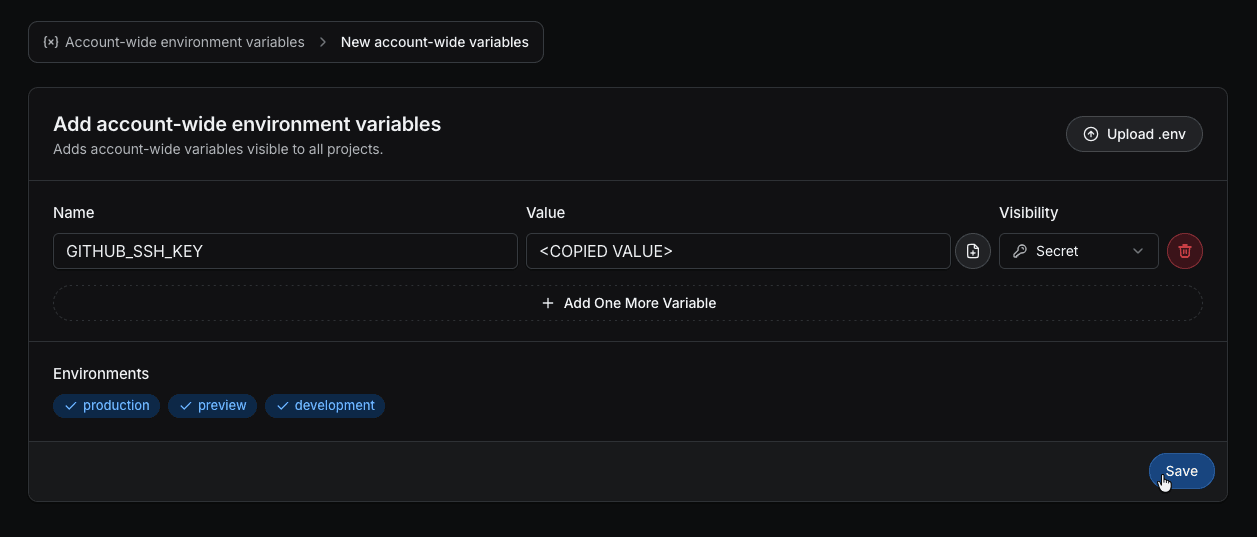
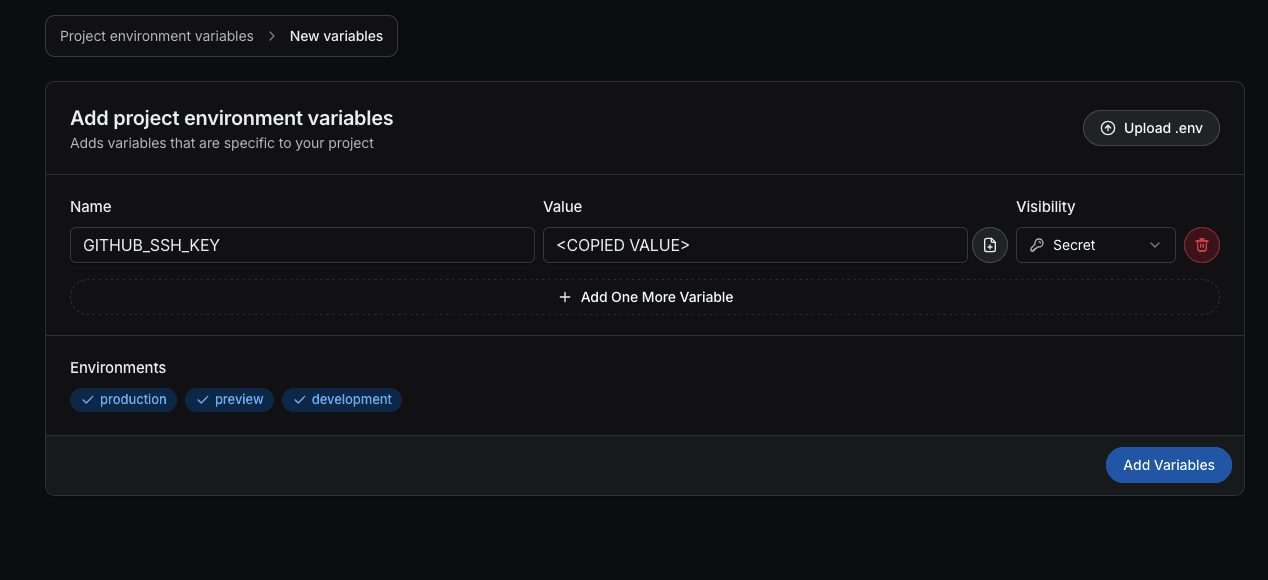
In the new variables view give our new variable a meaningful name, like GITHUB_SSH_KEY and paste the value of the base64-encoded private key. Let’s select the Secret visibility type, make sure all three environments are checked and click Save to add the variable:
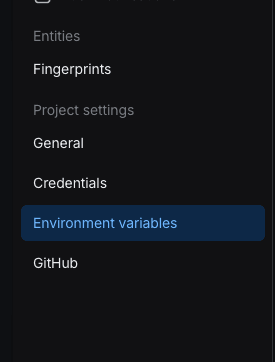
If you want to add the variable only to a selected project navigate to the project and then select Project settings > Environment variables page from the sidebar:
Similar to adding account-wide variables, click the + Add Variables button:
Then, enter the name and the copied private key value in the new variables view. Make sure to select the Secret visibility type and to check all three environments. Confirm adding the variable by clicking Add Variables:
Setting up GitHub access in a project using EAS
Now, our EAS builds will contain an additional environment variable — GITHUB_SSH_KEY holding our base64-encoded private key. But just having the value of the key in the environment isn’t enough to be able access our repository. It’s also important to ensure that the build machine has the correct SSH key configured. To do that, we’ll restore the SSH key based on the environment variable we’ve just added. Let’s wrap this setup up in another bash script. Add a new file named setup-github-access.sh to the scripts directory:
#!/bin/bash

GIT_USER_NAME="<Your name>"
GIT_USER_EMAIL="<Your email>"

# If we run the build locally skip the setup
if [[ "$EAS_BUILD_RUNNER" == "local-build-plugin" ]]; then
  echo "The build is being ran locally"
  echo "Skipping the GitHub SSH key setup"
  exit 0
fi

# Create the $HOME/.ssh directory
mkdir -p ~/.ssh

# Restore private key from env variable and generate public key
umask 0177
echo "$GITHUB_SSH_KEY" | base64 -d > ~/.ssh/id_rsa
umask 0022
ssh-keygen -y -f ~/.ssh/id_rsa > ~/.ssh/id_rsa.pub

# Add GitHub to the known hosts
ssh-keyscan github.com >> ~/.ssh/known_hosts

# Set up Git user name and email
git config --global user.name $GIT_USER_NAME
git config --global user.email $GIT_USER_EMAIL
The script will run only on EAS Cloud (based on the EAS_BUILD_RUNNER value we used earlier) and will restore the required key and add GitHub to the known SSH hosts.
We also need to set up the Git user name and email to avoid two potential issues. If Git succeeds in inferring those configurations, the commits will be made by an Expo user.
But if it fails, our Git operations won’t be performed and the script will end up with an error:
Author identity unknown
*** Please tell me who you are.

Run

  git config - global user.email "[email protected]"
  git config - global user.name "Your Name"

to set your account's default identity.
Omit - global to set the identity only in this repository.

fatal: empty ident name (for …) not allowed
Let’s ensure the script has the right execution permissions:
chmod +x ./scripts/setup-github-access.shIt should now be ready to include in our build process. Next, we’ll explore three different ways to integrate it into our build flow.
Setting up SSH key using build lifecycle hooks
If we aren’t using custom builds, we can simply add another build lifecycle hook that will run the script we’ve created in the previous section. Since the only requirement is that the SSH key is set up before new-tag.sh is executed, we can either run both scripts in the same eas-build-on-success hook or run our script earlier, for example in the eas-build-pre-install or eas-build-post-install hook:
"scripts": {
  "eas-build-on-success": "scripts/setup-github-access.sh && scripts/new-tag.sh",
  "start": "expo start",
  …

// or

"scripts": {
  "eas-build-on-success": "scripts/new-tag.sh",
  "eas-build-pre-install": "scripts/setup-github-access.sh",
  "start": "expo start",
  …

// or

"scripts": {
  "eas-build-on-success": "scripts/new-tag.sh",
  "eas-build-post-install": "scripts/setup-github-access.sh",
  "start": "expo start",
  …
We can then run the build locally to verify that our script is skipped:
[ON_BUILD_SUCCESS_HOOK] Script 'eas-build-on-success' is present in package.json, running it…
[ON_BUILD_SUCCESS_HOOK] > [email protected] eas-build-on-success
[ON_BUILD_SUCCESS_HOOK] > scripts/setup-github-access.sh && scripts/new-tag.sh
[ON_BUILD_SUCCESS_HOOK] The build is being ran locally
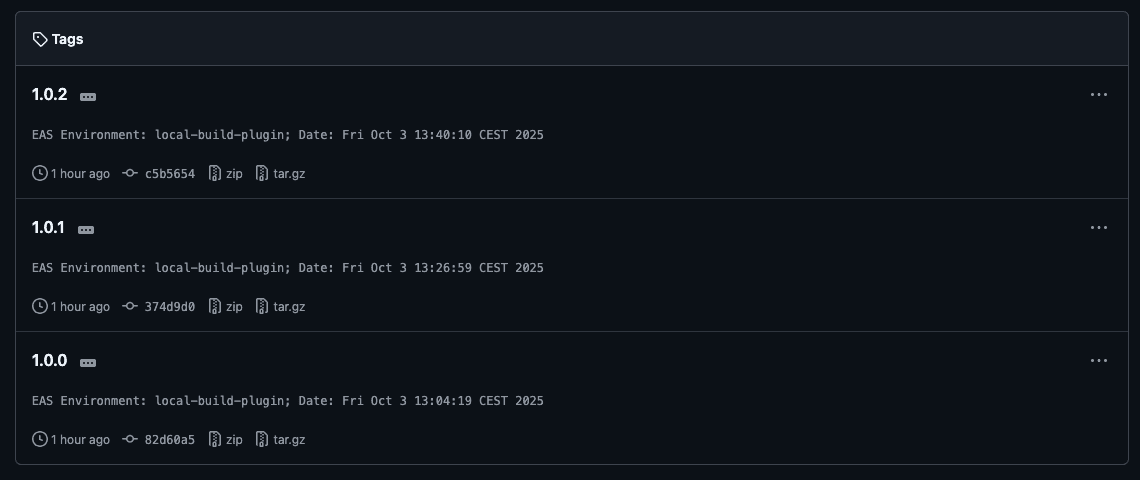
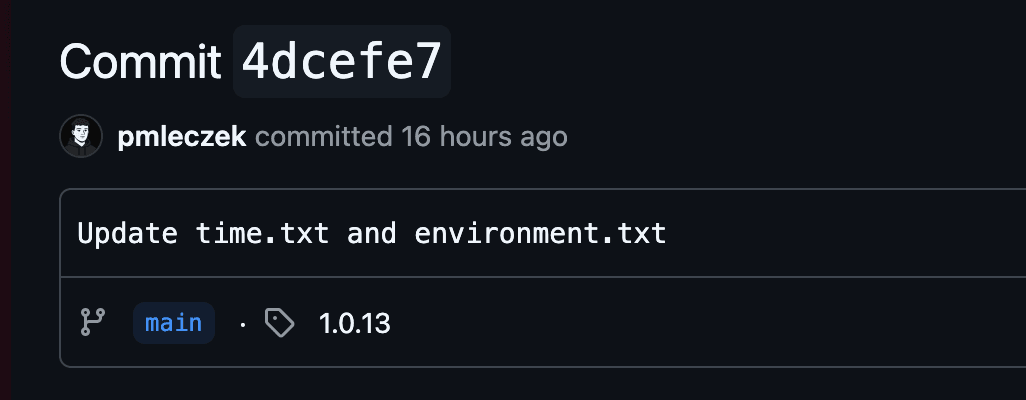
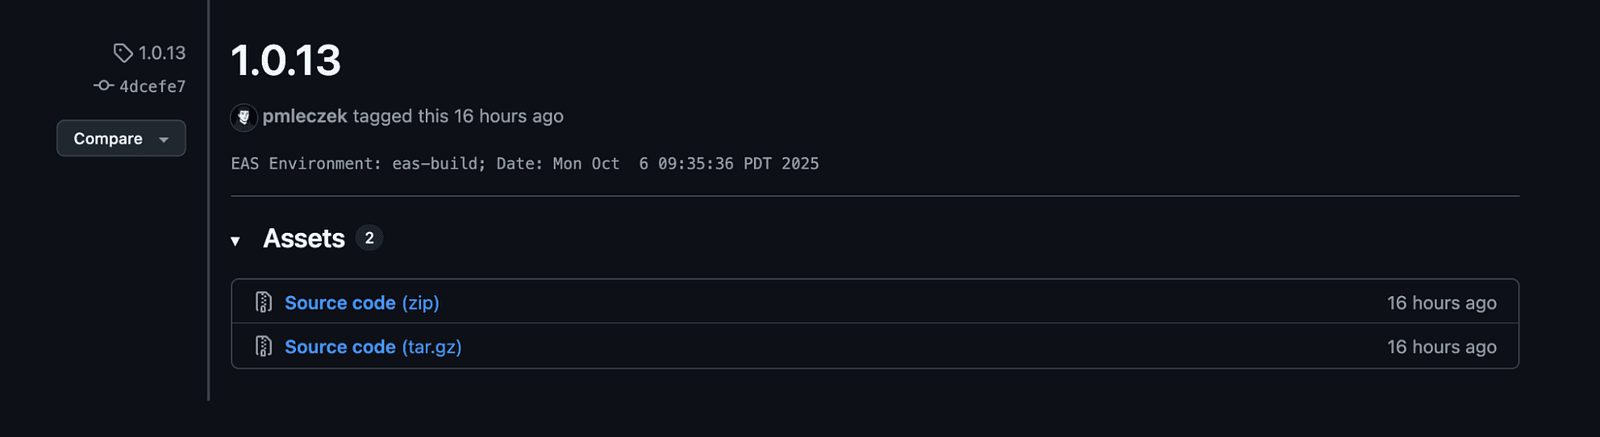
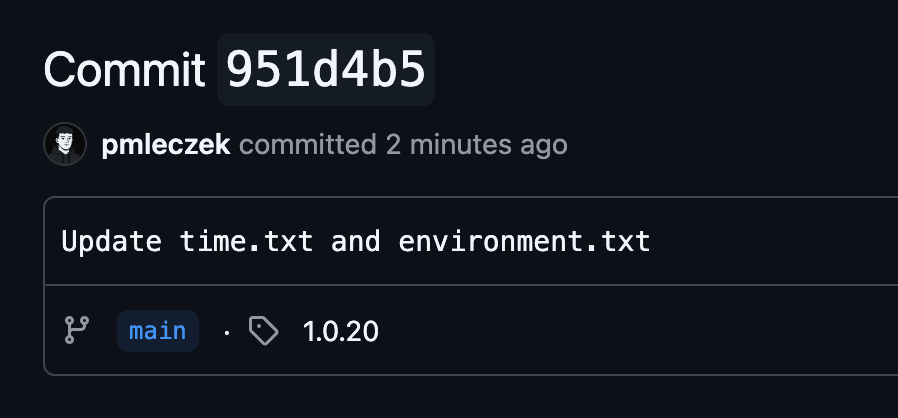
[ON_BUILD_SUCCESS_HOOK] Skipping the GitHub SSH key setupAnd on EAS Cloud, this should result in a new Git tag being created during a cloud build on GitHub:
Setting up SSH key using custom build step
If you’re already using or prefer using custom builds, we can add a new custom build step. The requirement is the same as with the lifecycle hooks: the setup script must be called before the GitHub operations script. Let’s build on the custom build configuration from the previous steps and extend it with our new script:
# .eas/build/custom-build.yml
build:
 name: Check out project source code
 steps:
   - eas/checkout # Only check out the project files
   - run:
       name: Setup GitHub access
       command: scripts/setup-github-access.sh
   - run:
       name: Create new tag in the repository
       command: scripts/new-tag.sh
We can verify that the setup is skipped when build is run locally:
[Checkout] Changing default working directory to /var/folders/ww/0sybn_q92gd5v0k1dm2lby8c0000gn/T/eas-build-local-nodejs/b0b701ea-4147–49d0-a1
[Setup GitHub access] The build is being ran locally
[Setup GitHub access] Skipping the GitHub SSH key setup
[Create new tag in the repository] Cloning into 'eas-github-ssh-private-repository'…
[Create new tag in the repository] [main 3ac6f9b] Update time.txt and environment.txt
This confirms that the SSH key is set up correctly on EAS Cloud, as the new tag created during the cloud build appears on GitHub:

Setting up SSH key using a TypeScript function
The setup script can also be written as a TypeScript function. EAS supports extending custom builds with TypeScript functions out-of-the-box. More information about it can be found here.
To start, initialize a new function by running this command in the project’s root:
npx create-eas-build-function@latest ./.eas/build/setupGithubAccessThe above command will generate a new npm package at the .eas/build/setupGithubAccess directory. This package will contain our function’s source code and handle its build process:
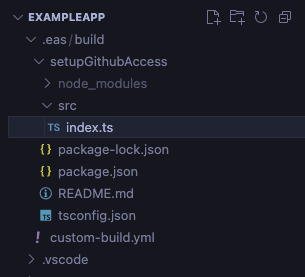
The automatically generated index.ts file serves as the entry point for our build function.
// This file was autogenerated by `create-eas-build-function` command.
// Go to README.md to learn more about how to write your own custom build functions.

import { BuildStepContext } from "@expo/steps";

// interface FunctionInputs {
// // specify the type of the inputs value and whether they are required here
// // example: name: BuildStepInput<BuildStepInputValueTypeName.STRING, true>;
// }

// interface FunctionOutputs {
// // specify the function outputs and whether they are required here
// // example: name: BuildStepOutput<true>;
// }

async function myFunction(
  ctx: BuildStepContext
  // {
  // inputs,
  // outputs,
  // env,
  // }: {
  // inputs: FunctionInputs;
  // outputs: FunctionOutputs;
  // env: BuildStepEnv;
  // }
): Promise<void> {
  ctx.logger.info("Hello from my TypeScript function!");
}

export default myFunction;
Since our function doesn’t use any inputs or outputs, we can remove the commented-out code and add the same condition to skip execution when run locally, just like in the bash version:
import { BuildStepContext } from "@expo/steps";

async function myFunction(
  ctx: BuildStepContext
): Promise<void> {
  // Skip set up if the build is ran locally
  if (
    "EAS_BUILD_RUNNER" in ctx.global.env &&
    ctx.global.env["EAS_BUILD_RUNNER"] === "local-build-plugin"
  ) {
    ctx.logger.info("The build is being ran locally");
    ctx.logger.info("Skipping the GitHub SSH key setup");
    return;
  }
}

export default myFunction;
Now, let’s add the TypeScript equivalent of our bash script:
import spawnAsync, { SpawnOptions, SpawnResult } from "@expo/spawn-async";
import { BuildStepContext } from "@expo/steps";
import { appendFile, mkdir, writeFile } from "node:fs/promises";
import { homedir } from "node:os";

// Utility wrapper around spawnAsync from @expo/spawn-async
async function runCommand(
  cmd: string,
  args?: string[],
  options?: SpawnOptions
): Promise<SpawnResult> {
  const result = await spawnAsync(cmd, args, options);

  if (result.status !== 0) {
    throw new Error(result.stderr);
  }

  return result;
}

async function setupGithubAccess(ctx: BuildStepContext): Promise<void> {
  // Skip set up if the build is ran locally
  if (
    "EAS_BUILD_RUNNER" in ctx.global.env &&
    ctx.global.env["EAS_BUILD_RUNNER"] === "local-build-plugin"
  ) {
    ctx.logger.info("The build is being ran locally");
    ctx.logger.info("Skipping the GitHub SSH key setup");
    return;
  }

  // Store the value of the user's home directory
  const HOME_DIRECTORY = homedir();

  // Create the $HOME/.ssh directory
  await mkdir(HOME_DIRECTORY + "/.ssh", { recursive: true });

  // Restore private key from env variable and generate public key
  if (!("GITHUB_SSH_KEY" in ctx.global.env)) {
    ctx.logger.error("Variable GITHUB_SSH_KEY not found in the environment");
    throw new Error("Could not find GITHUB_SSH_KEY in the environment");
  }

  const sshKey = ctx.global.env["GITHUB_SSH_KEY"] ?? "";
  const sshKeyBuffer = Buffer.from(sshKey, "base64");
  process.umask(0o0177);
  await writeFile(
    HOME_DIRECTORY + "/.ssh/id_rsa",
    sshKeyBuffer.toString("utf8")
  );

  const { stdout } = await runCommand("ssh-keygen", [
    "-y",
    "-f",
    HOME_DIRECTORY + "/.ssh/id_rsa",
  ]);

  process.umask(0o0022);
  await writeFile(HOME_DIRECTORY + "/.ssh/id_rsa.pub", stdout);

  // Add GitHub to the known hosts
  const { stdout: stdoutHosts } = await runCommand("ssh-keyscan", [
    "github.com",
  ]);
  await appendFile(HOME_DIRECTORY + "/.ssh/known_hosts", stdoutHosts);

  // Set up Git user name and email
  await runCommand("git", [
    "config",
    "--global",
    "user.name",
    "<Your first name>",
    "<Your last name>",
  ]);

  await runCommand("git", [
    "config",
    "--global",
    "user.email",
    "<Your email>",
  ]);
}

export default setupGithubAccess;
Before we can use the function in our builds, we need to build it first. When working with TypeScript functions, it’s important to remember that any changes require a rebuild to update the function. Navigate to the function project and run the following command:
cd .eas/build/setupGithubAccess

npm run build
If the build succeeds, the build directory will be generated at .eas/build/setupGithubAccess and we should be ready to use the function within our custom build:
# .eas/build/custom-build.yml
build:
 name: Check out project source code
 steps:
   - eas/checkout # Only check out the project files
   - setup_github_access
   - run:
       name: Create new tag in the repository
       command: scripts/new-tag.sh

functions:
 setup_github_access:
   name: Setup GitHub access
   path: ./setupGithubAccess
Let’s run the build process locally to confirm that, as with the bash script, it’s being skipped:
[Setup GitHub access] The build is being ran locally
[Setup GitHub access] Skipping the GitHub SSH key setup
[Create new tag in the repository] Cloning into 'eas-github-ssh-private-repository'…
When run on EAS Cloud, a new tag is created from the eas-build environment.


The takeaway
Thanks to Expo EAS’s customizability, you can easily extend an existing build workflow to include GitHub access. With the rich API provided by EAS Build, there are at least three ways to accomplish this, allowing you to choose the approach that best fits your workflow.
The full code for this tutorial can be found at: https://github.com/pmleczek/eas-ssh-keys-example, so be sure to check it out and give it a try in your project.
And if you need help along the way, you can always reach out to us at [email protected]. As the top contributing group to the Expo ecosystem, we’re more than ready to help you!
We’re Software Mansion: multimedia experts, AI explorers, React Native core contributors, community builders, and software development consultants.