Reanimated 2 Events (part II) — Scroll Events
 TurboDevelopers•Feb 8, 2021•5 min read
Intro
In this blog post, we dive deeper into the area of handling events with Reanimated 2 by explaining how Reanimated’s API can be used to react to scroll events and to control the scroll position. Scrolling is a very common interaction on mobile devices as we often have too much content to fit on a single screen and thus we need to add a possibility to scroll down to see the rest of it. As with all types of touch interactions, we may often want to make the scrolling experience more unique by adding additional effects to the content we scroll, or to the scroll view’s surrounding.
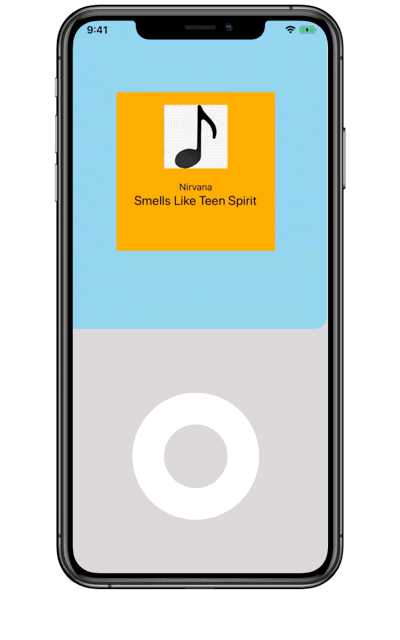
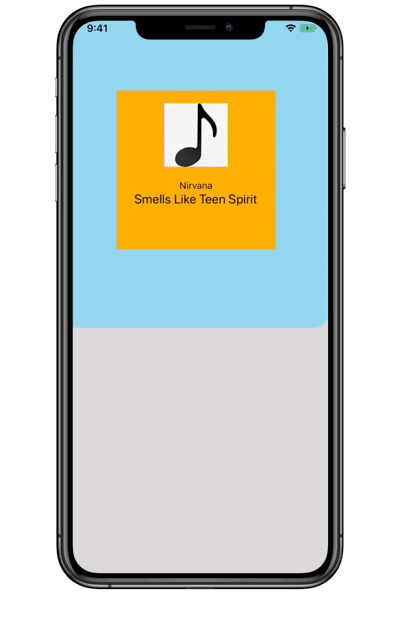
In this post, we are going to create a scroll component that would react to its events as well as to the external ones coming from another component. To show it in a nice way we took an example from the classic iPod look.
If you are just starting learning Reanimated, we recommend that you check our previous blog posts. In particular, if you are interested in learning more about integrating other types of gesture interactions, check out our blog post about events about events in Reanimated 2.
Here is how the final result is going to work. To switch between list items we can scroll the list itself, or use the wheel below it. You can get the full code here with all styles and details.
Basic scroll
Having a sample dataset(being an array of objects, see how it looks here) we create a scroll view containing items that represent it.
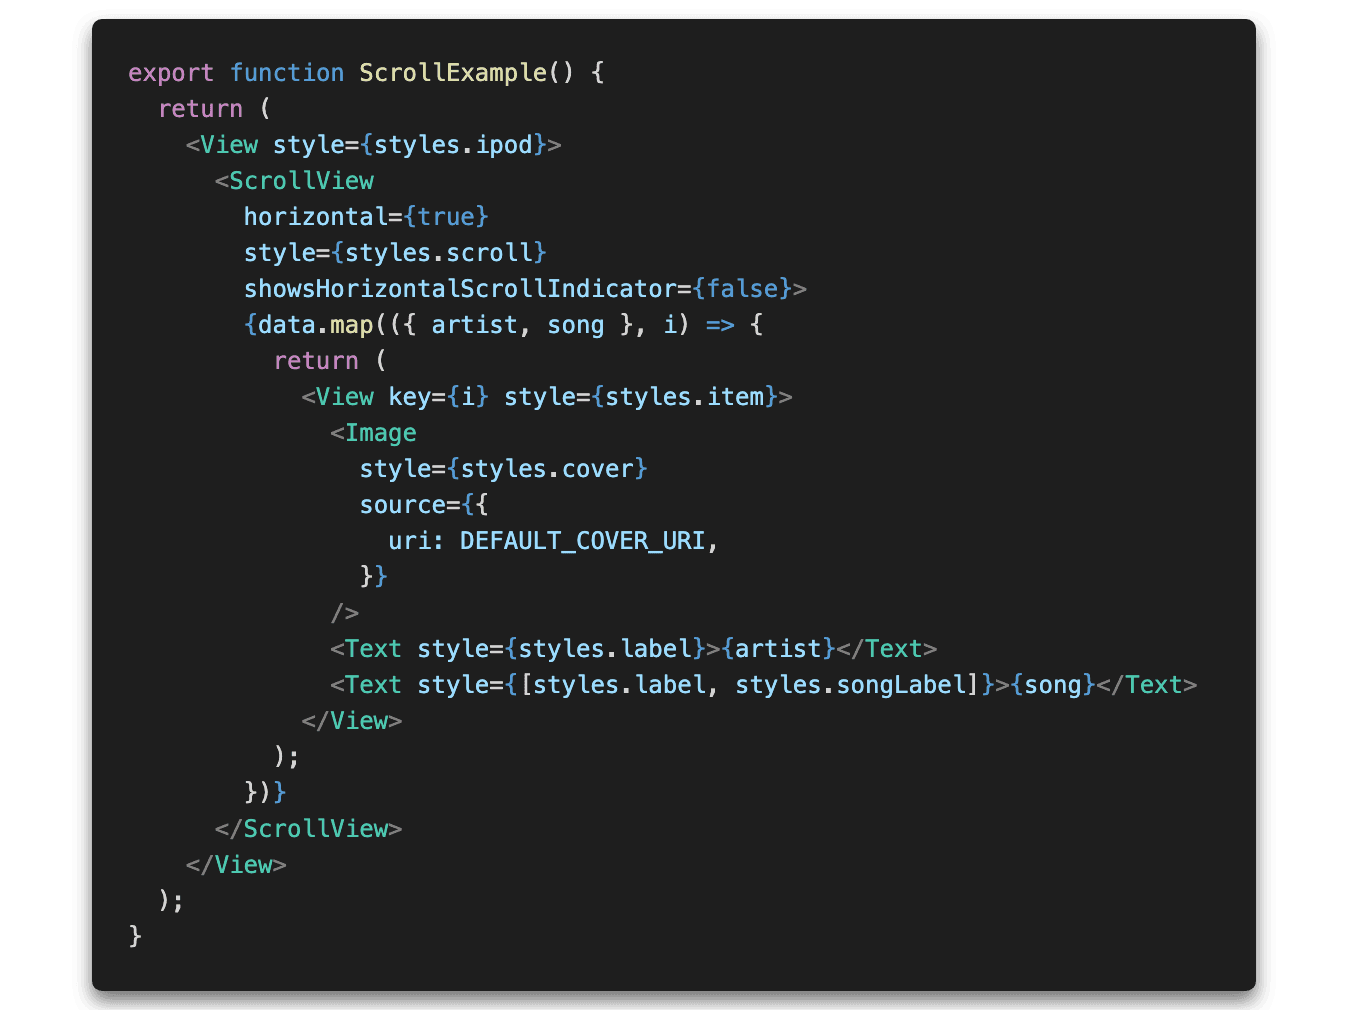
The code above renders multiple items from an array inside of the horizontal scroll view.
Scroll events
This works fine as everything is handled directly by the scroll view. Now, we want to add the functionality of snapping to the nearest item once the scroll reaches the final position. An alternative approach would be to use pagingEnabled prop available in the ScrollView, but it doesn’t really fit here as it enables only scrolling to an item that is next to the current one while we want to be able to scroll further depending on the scrolling event’s velocity.
In order to receive updates about the scroll component’s current position we attach a scroll event handler to it. Let’s start with defining our handler:
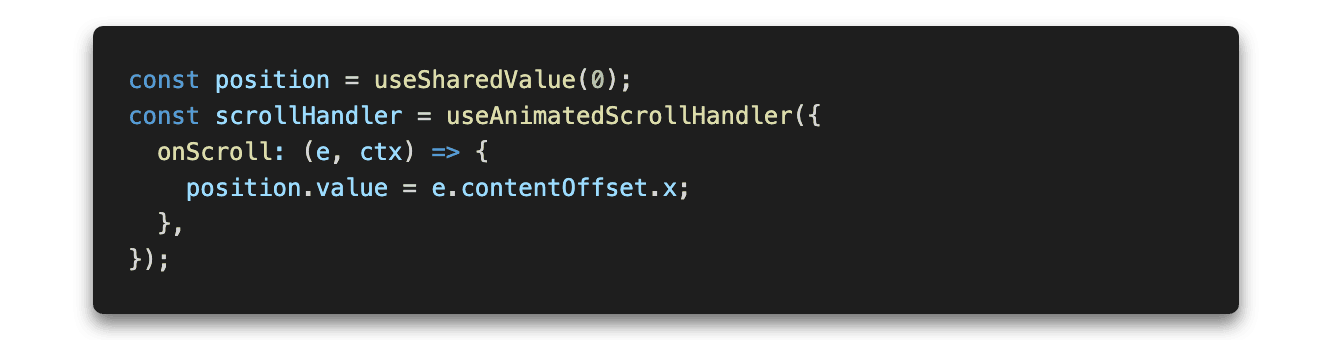
Here, it’s shown how to map a scroll position to a shared value. We won’t need this now, but this is the most basic use-case of the handler and the simplest way to show how it works.
It’s also possible to use a shorter version of this hook. useAnimatedScrollHandler may also take a function as an argument. In such a case we only handle onScroll events. So the code below does exactly the same thing as the code above:

We passed an object as an argument because we are going to use other scrolling events in this hook. It’s done later in this post.
We declared a shared value that is going to store the current scroll position. Then, we created a scroll event handler using the useAnimatedScrollHandler hook. onScroll callback is triggered every time we move the scroll view in any direction. We use it here to update our shared value.
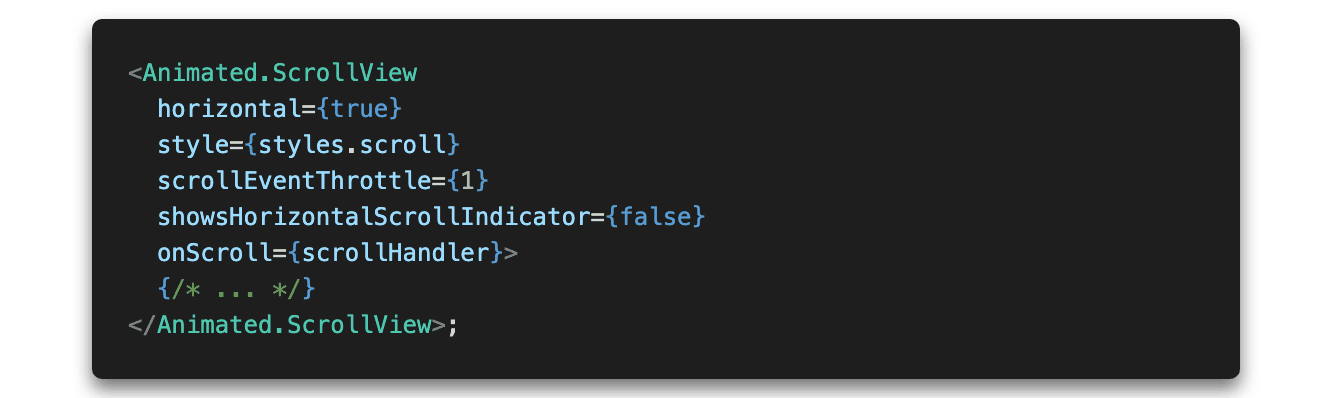
Now, we assign the handler to our ScrollView (don’t forget to turn our ScrollView into an animated component):
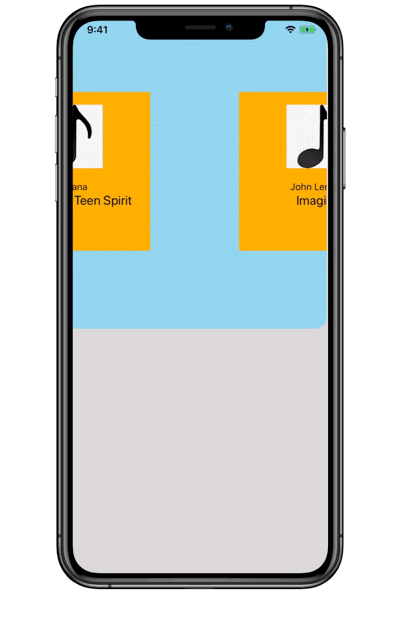
Our goal is to avoid a situation when the scroll is stuck between two items like this:
Basically, we need a function that could tell us which element is closest to the current position and move the scroll so that item is in the center.
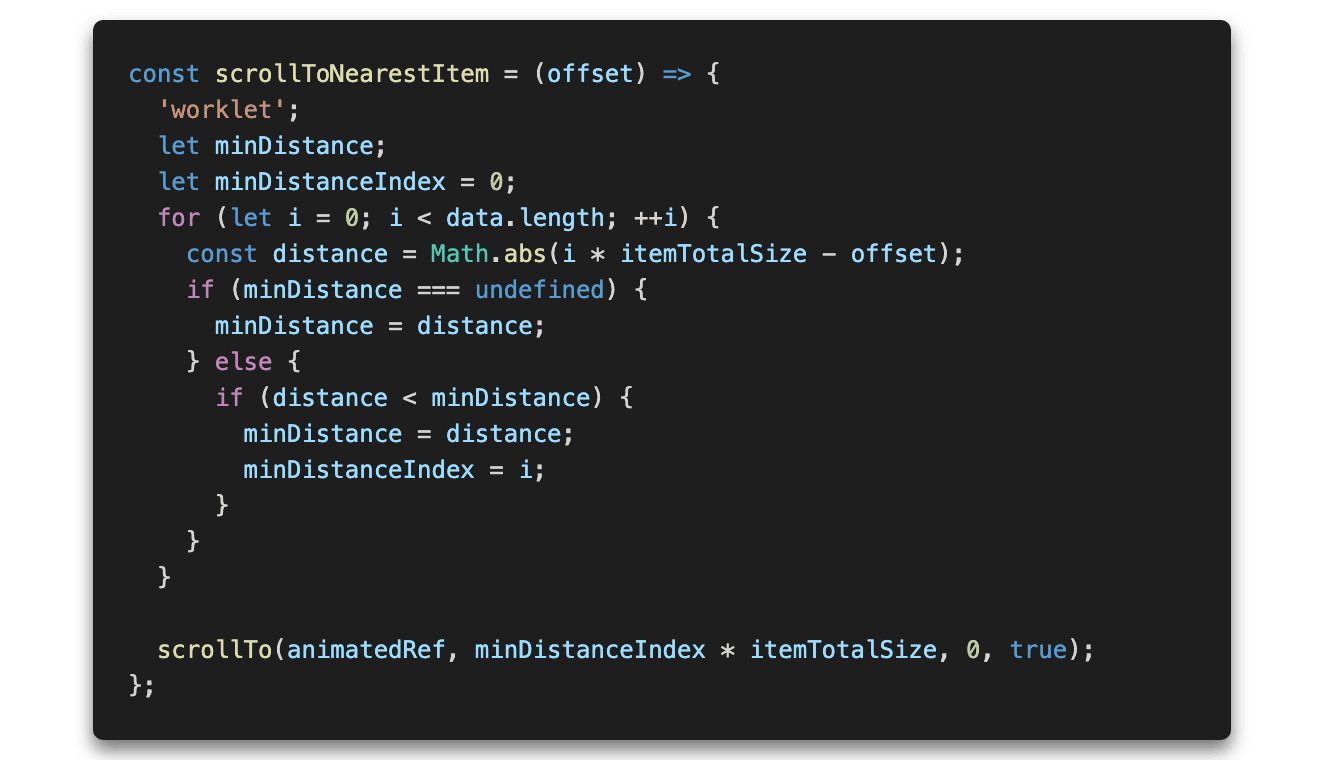
If we want to call scrollTo function on an animated component, we need to create an animated ref:

useAnimatedRef can be used to keep a reference to a view instance much like React’s useRef, however, it also makes it possible for the view reference to be used from the UI thread where reanimated worklets run. That UI reference is then used by the scrollTo function.
Now let’s pass it to our Animated.ScrollView.

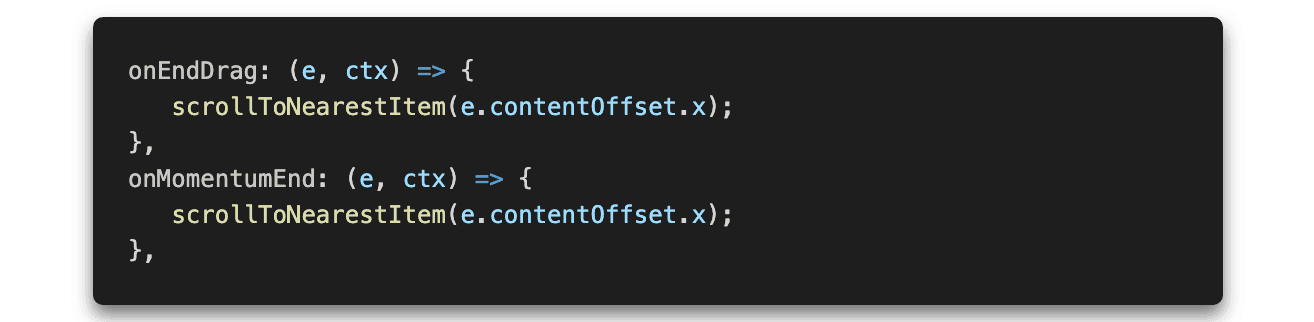
The useAnimatedScrollHandler is able to handle a couple of different events, not only onScroll, exactly like useAnimatedScrollHandler, which we can attach to different states of events — onStart, onActive, onEnd. We need to use two more callbacks inside of the useAnimatedScrollHandler hook. Here, we are going to use onEndDrag and onMomentumEnd. The first one, onEndDrag, is called when we release the scroll but what’s momentum? It handles a situation when we release the scroll with a gesture that causes it to move afterward. In other words, there is a certain velocity of a movement. There are two callbacks we can use to take care of momentum: onMomentumBegin and onMomentumEnd. The first one is fired when we release the finger off of the scroll and after it stops the movement, the other one comes into play.
With all the changes we made we obtained the following result:

Manipulating scroll from outside
One more thing we want to show in this article is how to set the scroll position from another component. A good example of this is interacting with PanGestureHandler as it allows us to handle continuous gestures, thus we will be able to show how the scroll updates on every frame.
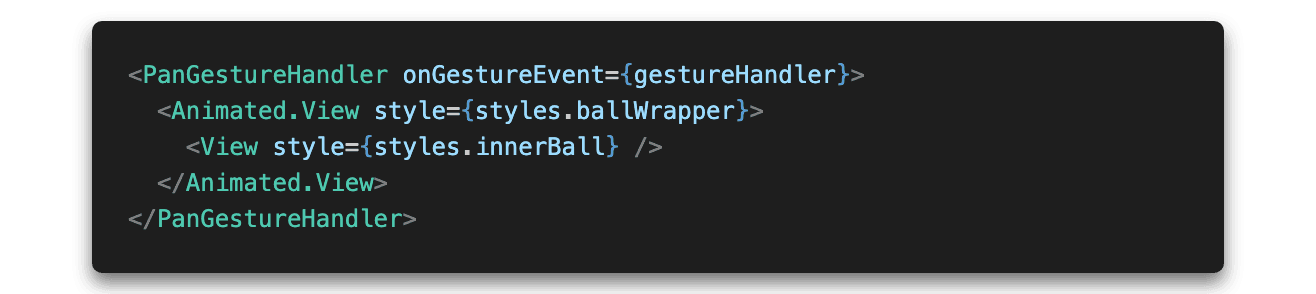
With proper styles applied it should look like this:

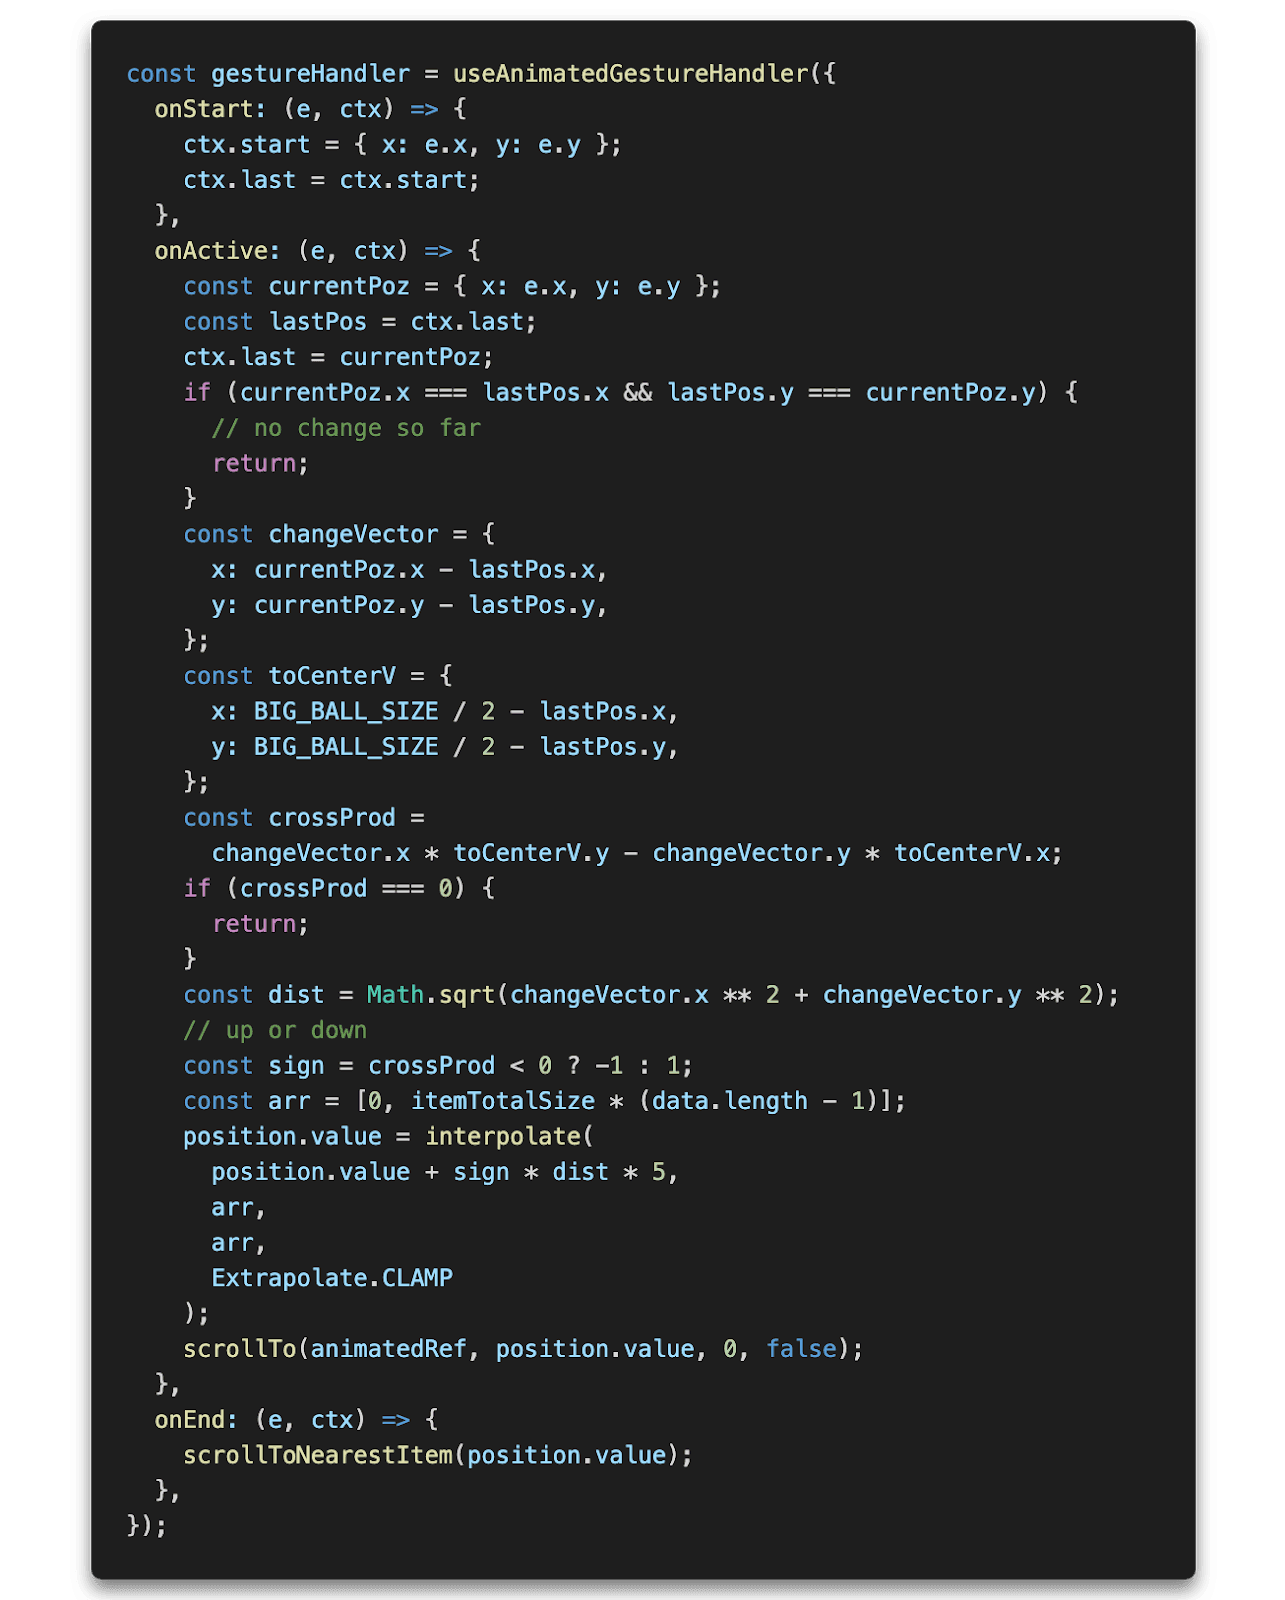
To achieve desired functionality we lack the implementation of the gesture handler. We want it to move the scroll by the offset based on the received event. We use three callbacks: onStart, onActive, and onEnd. In onStart we memoize the starting position, in onActive we calculate the offset and move the scroll using the synchronous method scrollTo and in onEnd we again use the method scrollToNearestItem to move the scroll so the nearest item would be in the center.
That’s all. With all the code we’ve added, the final effect should look like this:

The full code for this example can be found here.
If you like our work and find Reanimated 2 helpful, please show us your support and star our repo on GitHub. We will be more than happy if you share your ideas with us about Reanimated 2. Feel free to send us a message on Twitter or create an issue on GitHub.
Feel free to contact us on Twitter: Karol, Turbo_Szymon.
Reanimated 2 is brought to you by Software Mansion and Shopify.