
Building Agents With LangGraph Part 4/4: How We Built Our Marketing Agent
 Piotr Zborowski•Jan 21, 2026•4 min read
In the previous parts of our series, we’ve explored the key concepts behind building AI agents with LangChain and LangGraph, and we’ve constructed a fully-functional AI chatbot along the way. Today, we’re diving into a case study from the development of our very own marketing agent.
At Software Mansion, we specialize in building AI tools. Finding places where people might benefit from them is time-consuming, so we wanted to automate the process with an AI agent identifying opportunities to showcase our solutions. In this article, we’ll tell you how we built the agent that uses a search engine to find websites where our products could be promoted. The code is available here.
Our approach relies on a system consisting of three agents: Critic, Selector, and Search. Assigning non-overlapping tasks to different agents improves token usage efficiency, simplifies history management, and enhances results by keeping each context smaller. Different foundation models can also be used per agent based on task complexity.
The Critic agent
First, the Critic takes specific website content as input and evaluates if it’s suitable for advertising our products. We use structured output, so the model lists the pros and cons of selecting the website. The process starts by loading a description of the product to advertise, then introducing the Critic’s role via a system prompt, and finally passing the website content for evaluation.
Since multiple websites are passed to the Critic, we use batch invocation to save time. Our agentic workflows are I/O-bound, spending most of their time waiting for responses from the foundation model API, so running several invocations concurrently helps speed up the process.
To use batch invocation, we simply need to pass a list of initial states instead of a single one, and we receive a list of results in return:
initial_states = [{...}, {...}, ...]
responses: list[BaseMessage] = model.batch(initial_states)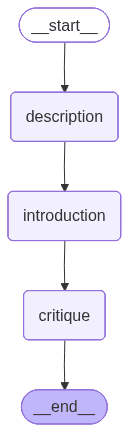
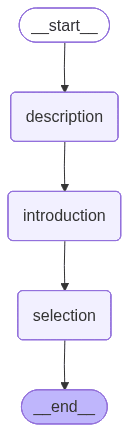
The Selector agent
Another agent, very similar in structure, is the Selector. At this point, we have a list of candidate websites along with evaluations of their suitability for advertising. The Selector uses these evaluations to decide which website to return.
First, the product description is loaded, then we define the Selector’s role through a system prompt, and finally, the selection is made. Structured output is used again to ensure the response follows the correct format.
The Search agent
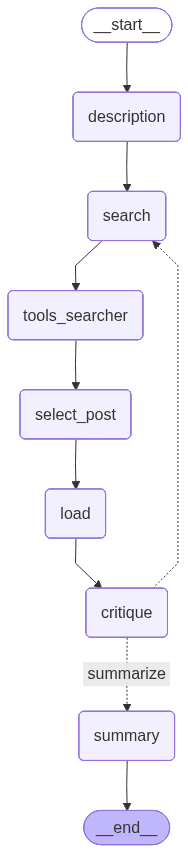
The Search agent is the core of the system, orchestrating the two remaining agents. In our case, it uses a search engine based on DuckDuckGo as a tool.
Like the other agents, it begins by loading the product description. Then, the foundation model uses a tool to search the web and selects which websites to load based on their titles and summaries. Once loaded, the content is passed to the Critic. Based on the Critic’s feedback and the iteration limit, the model either continues searching (goes back to search) or summarizes the results by calling the Selector.
The marketing agent in action
The main goal of our project was to automate the process of finding marketing opportunities for React Native ExecuTorch. The prototype was initially built with smolagents, but we later migrated to the LangChain environment, which gave us greater control, reduced token usage, and produced more precise results.
As the project matured, we expanded it to cover other products and built a web UI to give everyone at our company — not just AI developers — easy access to the agentic system.
Now, users of our marketing agent can conveniently store configurations for multiple products they want to promote. As an example, we’ll show you the setup for our React Native ExecuTorch library:

First, the user needs to describe the product, the use cases, the audience, and other important information. Next, there is a field where agentic prompts can be edited. Each comes with a description of its role in the system, so that the user knows exactly what to edit without having to understand the workflow of our subagents.
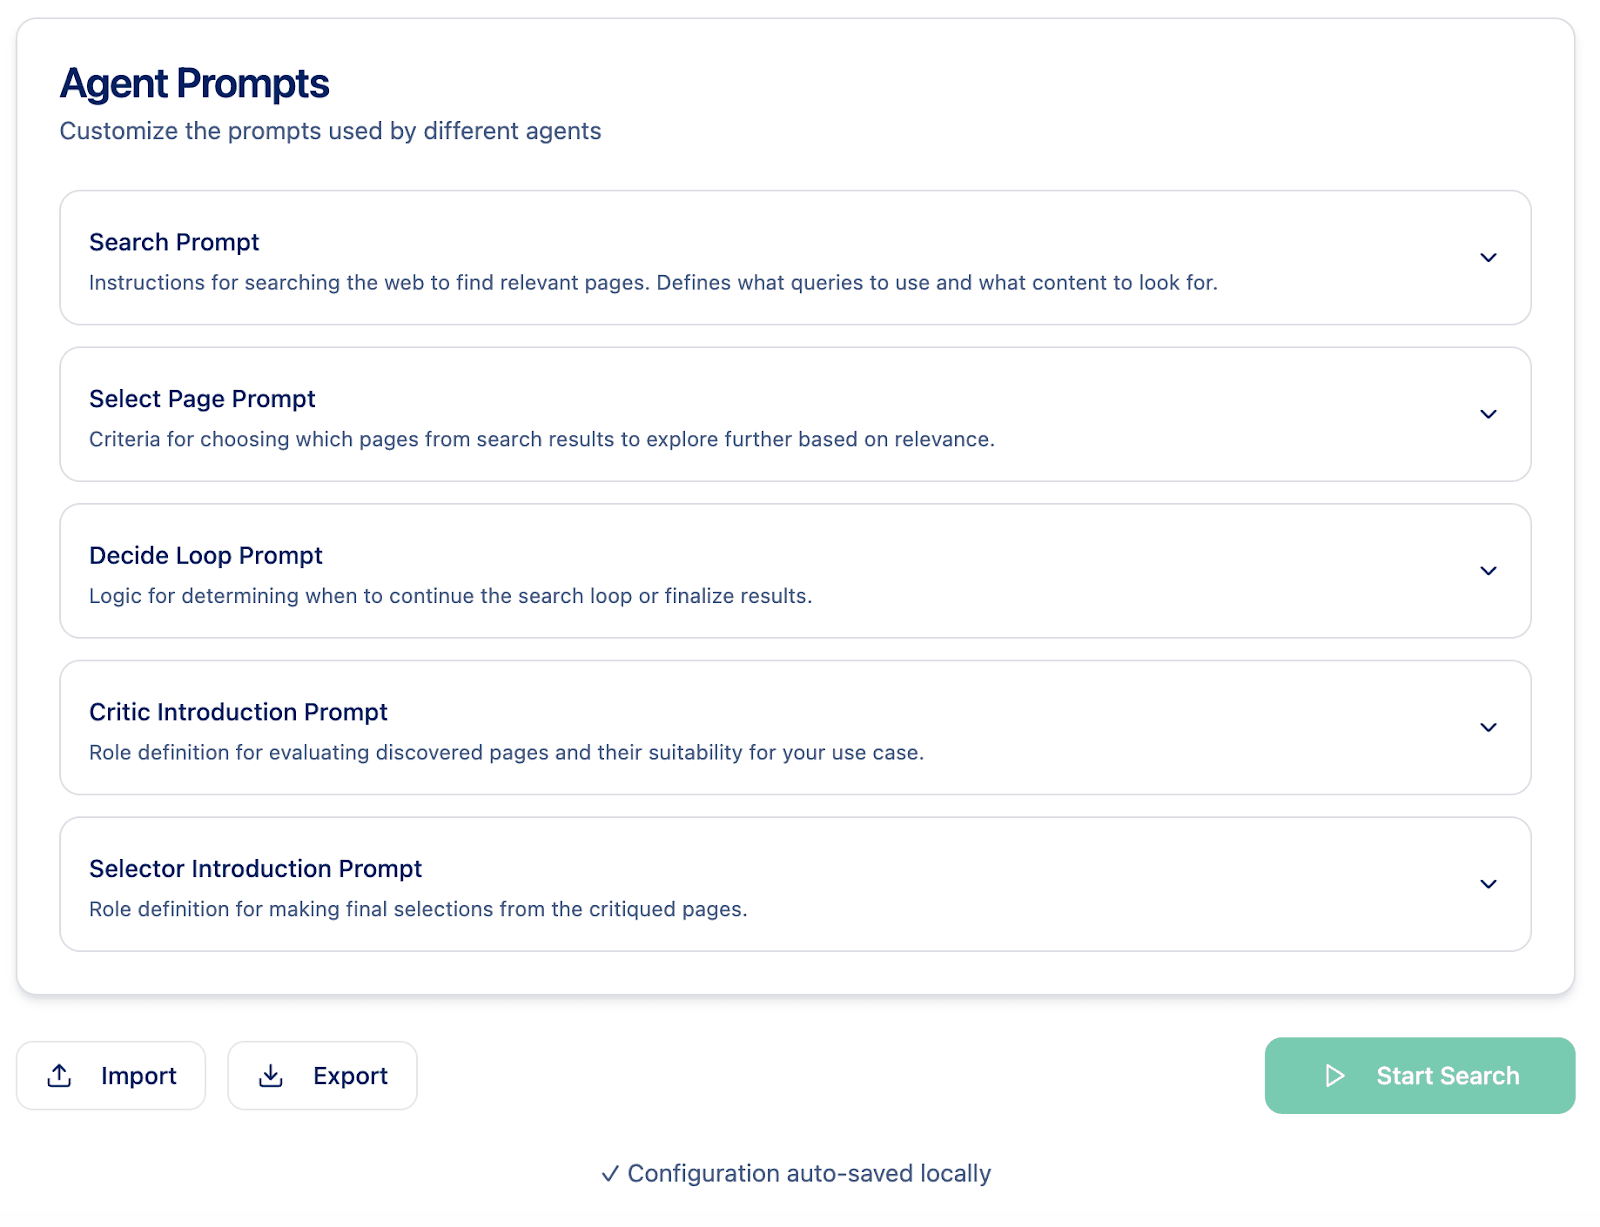
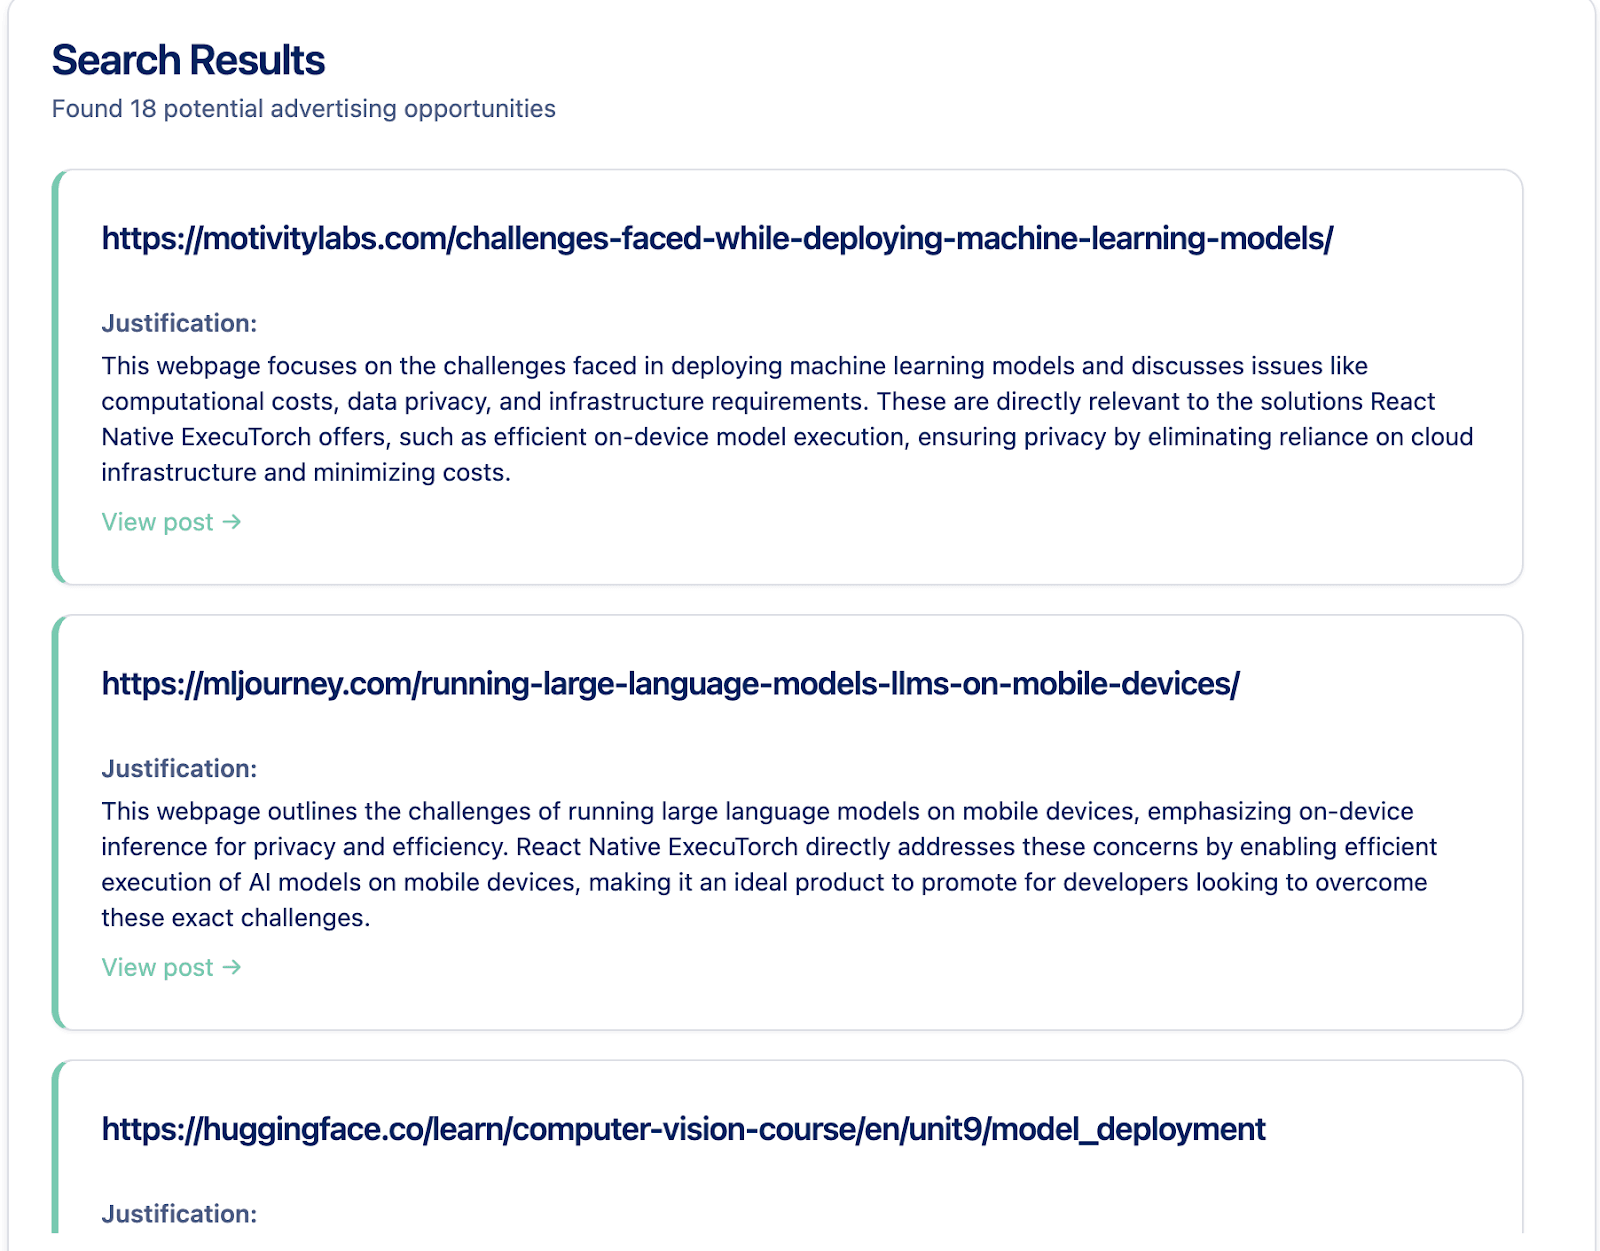
Configurations are stored in the browser memory, but they can also be imported or exported. Once the configuration is ready, users just need to click “Start Search” and wait for the results. When the search is complete, they get a list of websites for advertisement, along with justifications for choosing them.
That was a quick glimpse into our real-world project, which has saved us a lot of time and is now used in our products. We hope that after reading this series, you’re ready to build efficient agentic systems with LangGraph. Good luck!
We are Software Mansion — software development consultants, a team of React Native core contributors, multimedia and AI experts. Drop us a line at projects@swmansion.com and let’s find out how we can help you with your project.