
Build and publish multiple RN apps from the same codebase. (part II)
 Aleksander Mikucki•Jul 6, 2020•5 min read
This is part 2 of our tutorial on building Branded Apps from a single codebase with React Native. In the first part, we learned how to make our app display the appropriate assets, brand specific styles, and selectively enable features based on a config file. If you haven’t read part 1 yet, we recommend you start from there.
Introduction
Now that the JavaScript part of the app works correctly, it’s time to make sure it has the correct icons and launch screens configured in the native configuration (just as you would configure it when building a normal Android or iOS app), and that we can deploy it as an individual entries in both the App Store and the Google Play Store.
The easiest way to get branded apps setup is to use the built-in features of both Xcode and Android Studio to define all the native differences between the apps. This allows us to choose the app version that we want to build using IDE’s UI, use default signing tools and more.
➡️ iOS
To get started, we create separate build configurations for the iOS project (click on your project name on the left, then open the Info tab, or go to Editor > Add configuration).

Next, select your single Target and go to its Build Settings tab. Type in the “Product Bundle Identifier” (the unique app id used by Apple) and “Product Name” (displayed underneath your app icon on the home screen) for each configuration. For example, the GetACab will use “com.taxi.getacab“ as a Bundle Identifier and “Get A Cab“ as a Product Name.
Then, you need to create different app icons in the Base.xcassets folder. To do that, you need to right click on the empty file list and choose New Image Set. Place your iconimages here (a set of app icons for different resolutions is required, if you want to use a scaled version of a single icon you can for example use appicon.co). Repeat this for each of the branded app versions you want to make, creating a separate image set for each one.
Go back to your project build settings and update the “Asset Catalog App Icon Set Name” attribute with names of the previously created image sets. For the GetACab app, if you named your set GetACabAppIcon, type that exact value into the slot for the GetACab configuration.
Getting launch screen to work takes a bit of creative thinking, as Apple now requires launch screens to be defined as so called storyboards to properly support dark mode and different screen sizes.
Create a single LaunchScreen.storyboard in the project root, and create as many <AppName>.xcassets as you need at the same level as Base.xcassets (so in the project root). In each of them create an identically named image set (for example SplashScreenSet). Drop one of these sets into the created LaunchScreens, and move it to where you want it. This allows you to replicate those minimalistic launch screens with the single icon that are all the rage anyway 😛.
To get the correct image selected we’ll use the project > build options > Excluded Source File Names fields. Here, for each configuration you need to exclude every asset set except the one that should be displayed for selected app. GetACab field can contain “Taxi.xcassets” and “ThisOtherTaxiApp.xcassets” (this is a list, so double click that entry field). This way, we make sure that only the correct asset set is bundled and displayed on the launch screen. Don’t worry that a different logo shows up even if you select a specific configuration. This doesn’t work correctly in Xcode preview, but it will work after ad-hoc/testflight/production deployment to the device.
Dynamic screens are now required by Apple in order for your app to be accepted in the App Store. Unfortunately we couldn’t find a better way other than the one described above. If you know of other, better ways of getting this configured, please let us know in the comments.
➡️ Android
The Android side is easier to configure with this functionality built right in as something called productFlavors. You can specify resValues (those are essentially variables that you can use throughout your app configuration, and they will be replaced with their value during build) here or in the values folder specific for a flavor (remember to actually use those resValues in your AppManifest).
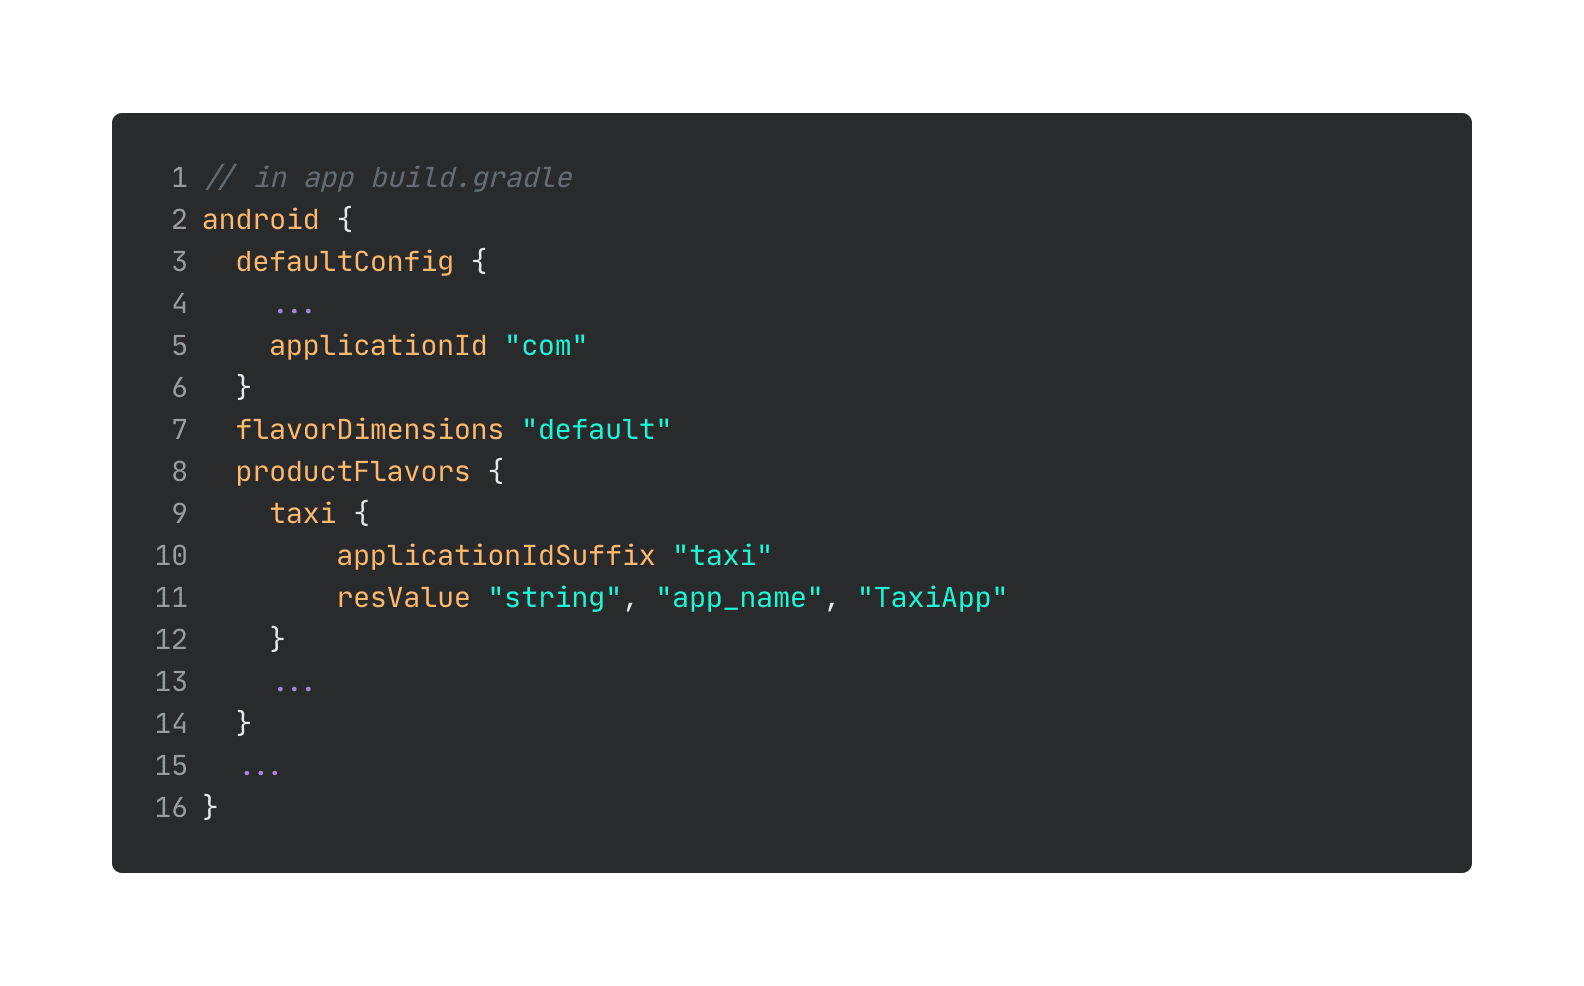
To handle app icons, you can create directories in ‘app/src’ with names matching your flavors. The res and values folders you put in them will get merged with the main folder when the given app flavor is built.
For example, ‘app/src/taxi/res’ will get merged with ‘app/src/main/res’. If you have an asset stored in both folders, the one coming from the flavor folder will take precedence.
Nice job android 👏.
This is all for the second part of the tutorial. If you want to learn about the rest of the pieces of the Branded App puzzle, check out the other parts:
➡️ Part III: Setup Fastlane + Detox, take UI screenshots and manage metadata. Some insights and ideas for improvement. (coming soon)
Once again, if you have any ideas, improvements, questions, or issues reach out to me on twitter @aleqsio. Hope you’ll have a great day 👋.