Bringing native AI to your mobile apps with ExecuTorch — part II — Android
 Wojtek Jasinski•Jul 12, 2024•6 min read
ExecuTorch is a new PyTorch-based framework that allows you to export your models to formats suitable for local deployments on devices such as smartphones or microcontrollers. With a little bit of native code, you can easily bring AI features into your React Native apps!
In this tutorial, we’ll guide you through using ExecuTorch to export and run a model on an Android device using the XNNPACK backend.
If you’re interested in implementing a similar setup for iOS devices with CoreML, we’ve covered this in our previous blog post. Check it out here.


Model export
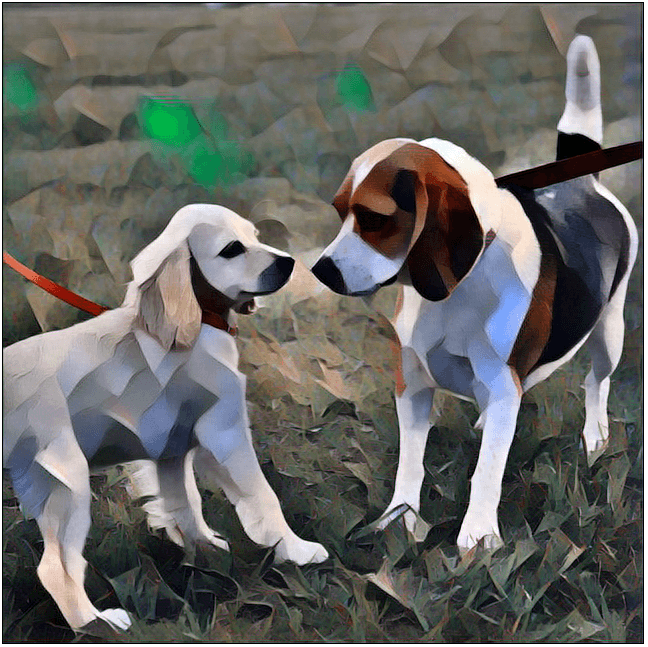
We will showcase the whole process of style transfer models — we borrow the architecture and weights from PyTorch examples repository.
The whole process consists of multiple steps. We start with the PyTorch nn.Module, and then turn it into a graph representation, which can be further optimized and customized for the target device. Along the way, we can apply quantization and offload certain operations to an optimized backend.
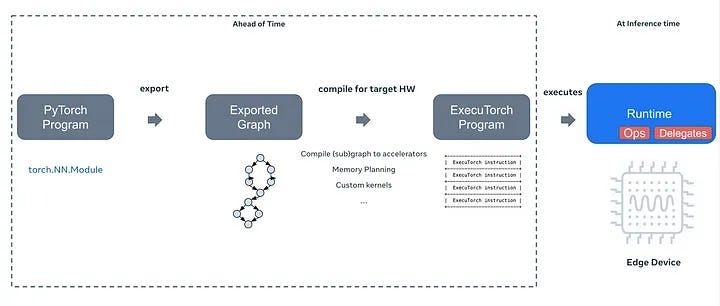
To accelerate the inference, we utilize XNNPACK — a highly optimized library designed for neural network inference across multiple platforms. XNNPACK significantly boosts the performance of neural networks, especially on mobile and edge devices, by optimizing key operations.
executorch/examples/xnnpack/aot_compiler.py at main · pytorch/executorch On-device AI across mobile, embedded and edge for PyTorch - executorch/examples/xnnpack/aot_compiler.py at main ·…github.com
Exporting models can sometimes be a bit tricky, so to keep things tidy, we’re working on a guide for this as well:
[the article coming soon]
Check it out if you’re interested in the finer details and want to follow along. If you’d rather skip ahead, we’ve got you covered! You can access the models at our repo.
Runtime and extensions
To run our model, we need the runtime! In this case, we need to build the ExecuTorch runtime with XNNPACK. You can read more in-depth about it in the article previously mentioned. If you do not want to go through the whole setup, we’ve prebuilt one for you. Go ahead and place it here: /app/src/main/jniLibs/arm64-v8a/libexecutorch.so
Another thing that comes in handy is the extensions — Java wrapper classes for ExecuTorch components, such as a Tensor, Module, and others. We can generate those files right after building the runtime and copy them into our app.
app/src/main/java/org/pytorch/executorch/
  ├── DType.java
  ├── EValue.java
  ├── INativePeer.java
  ├── Module.java
  ├── NativePeer.java
  └── Tensor.java
Let's get coding
Now we’ll integrate the style transfer into our React Native app on the Android side, building on the interface we came up with for IOS in the previous tutorial. StyleTransferModule module will include methods: initModules and applyStyleTransfer. This setup will work just as well for native apps - you just have to skip React Native parts.
React Native Module
We create the Native Module following the official docs. We create the StyleTransferModule, StyleTransferPackage and register it.
// MainApplication.kt

override fun getPackages(): List<ReactPackage> {
  val packages = PackageList(this).packages.toMutableList()
  packages.add(StyleTransferPackage())
  return packages
}
So far, our files look like this:
app/src/main/java/com/anonymous/ExpoExecutorch/
 ├── MainActivity.kt
 ├── MainApplication.kt
 ├── StyleTransferModule.kt
 └── StyleTransferPackage.kt
Loading the model
We copy the model we exported to the raw resources directory here:
src/main/res/raw/candy_xnnpack_640_fp32.pte
Let’s implement the initModules method. We are going to load the module from .pte file by resource ID — R.raw.candy_xnnpack_640_fp32. A helper method loadModuleFromRawResource will come in handy.
// StyleTransferModule.kt
class StyleTransferModule(reactContext: ReactApplicationContext) : ReactContextBaseJavaModule(reactContext) {
    override fun getName() = "StyleTransferModule"
    private lateinit var mModule: Module

    @ReactMethod
    fun initModules(promise: Promise) {
        try {
            mModule = loadModuleFromRawResource(R.raw.candy_xnnpack_640_fp32)
        } catch (e: IOException) {
            promise.reject("Cannot load module", e)
        }
    }
// StyleTransferModule.kt
private fun loadModuleFromRawResource(resourceId: Int): Module {
reactApplicationContext.resources.openRawResource(resourceId).use { inputStream ->
val file = File(
reactApplicationContext.filesDir,
reactApplicationContext.resources.getResourceEntryName(resourceId) + ".pte"
)
FileOutputStream(file).use { outputStream ->
inputStream.copyTo(outputStream)
}
return Module.load(file.absolutePath)
}
}Running the model
We are moving past the boring part! Now let’s implement the applyStyleTransfer method.
First, we need to load our image from the URI. We cannot just get away with a bitmap — we need to convert it to a Tensor. Let’s start by scaling the image to match the dimensions we used when exporting our model — 640x640. Then, we'll convert it into a Float32 tensor.
// StyleTransferModule.kt

@ReactMethod
fun applyStyleTransfer(styleName: String, imageUri: String, promise: Promise) {
	val uri = Uri.parse(imageUri)
	val inputStream = reactApplicationContext.contentResolver.openInputStream(uri)
	val inputBitmap = Bitmap.createScaledBitmap(
	    BitmapFactory.decodeStream(inputStream),
	    640, 640, true
	);
	val inputTensor = TensorUtils.bitmapToFloat32Tensor(inputBitmap)

// ...
To keep our code clean, let's set up a new TensorUtilsclass, in which we are going to implement some utility methods to handle Tensor-related stuff, the first of which is going to be bitmapToFloat32Tensor.
To create a Tensor from a bitmap, first, we need to allocate the memory and then iterate through all the pixels filling the buffer.
// TensorUtils.kt

fun bitmapToFloat32Tensor(bitmap: Bitmap): Tensor {
  val height = bitmap.height
  val width = bitmap.width
  val floatBuffer = Tensor.allocateFloatBuffer(3 * width * height)
  bitmapToFloatBuffer(bitmap, floatBuffer)
  return Tensor.fromBlob(floatBuffer, longArrayOf(1, 3, height.toLong(), width.toLong()))
}

private fun bitmapToFloatBuffer(
    bitmap: Bitmap,
    outBuffer: FloatBuffer,
) {
    val pixelsCount = bitmap.height * bitmap.width
    val pixels = IntArray(pixelsCount)
    bitmap.getPixels(pixels, 0, bitmap.width, 0, 0, bitmap.width, bitmap.height)
    val offsetG = pixelsCount
    val offsetB = 2 * pixelsCount
    for (i in 0 until pixelsCount) {
        val c = pixels[i]
        val r = Color.red(c) / 255.0f
        val g = Color.green(c) / 255.0f
        val b = Color.blue(c) / 255.0f
        outBuffer.put(i, r)
        outBuffer.put(offsetG + i, g)
        outBuffer.put(offsetB + i, b)
    }
}
When the input Tensor is ready, we put it into an EValue and then call forward on a model. Then convert the output to a Tensor.
// StyleTransferModule.kt
// ...

val inputTensor = TensorUtils.bitmapToFloat32Tensor(inputBitmap)
val inputs = EValue.from(inputTensor)
val outputs = mModule.forward(input)
val outputTensor = outputs[0].toTensor()

// ...
Finally, let’s convert it back to a bitmap and save it. We implement another TensorUtils method — this time to convert the Tensor back to a bitmap.
// StyleTransferModule.kt
// ...
val outputBitmap = TensorUtils.float32TensorToBitmap(outputTensor)
val outputUri = saveBitmapToTempFile(outputBitmap, "result.png")
promise.resolve(outputUri.toString())
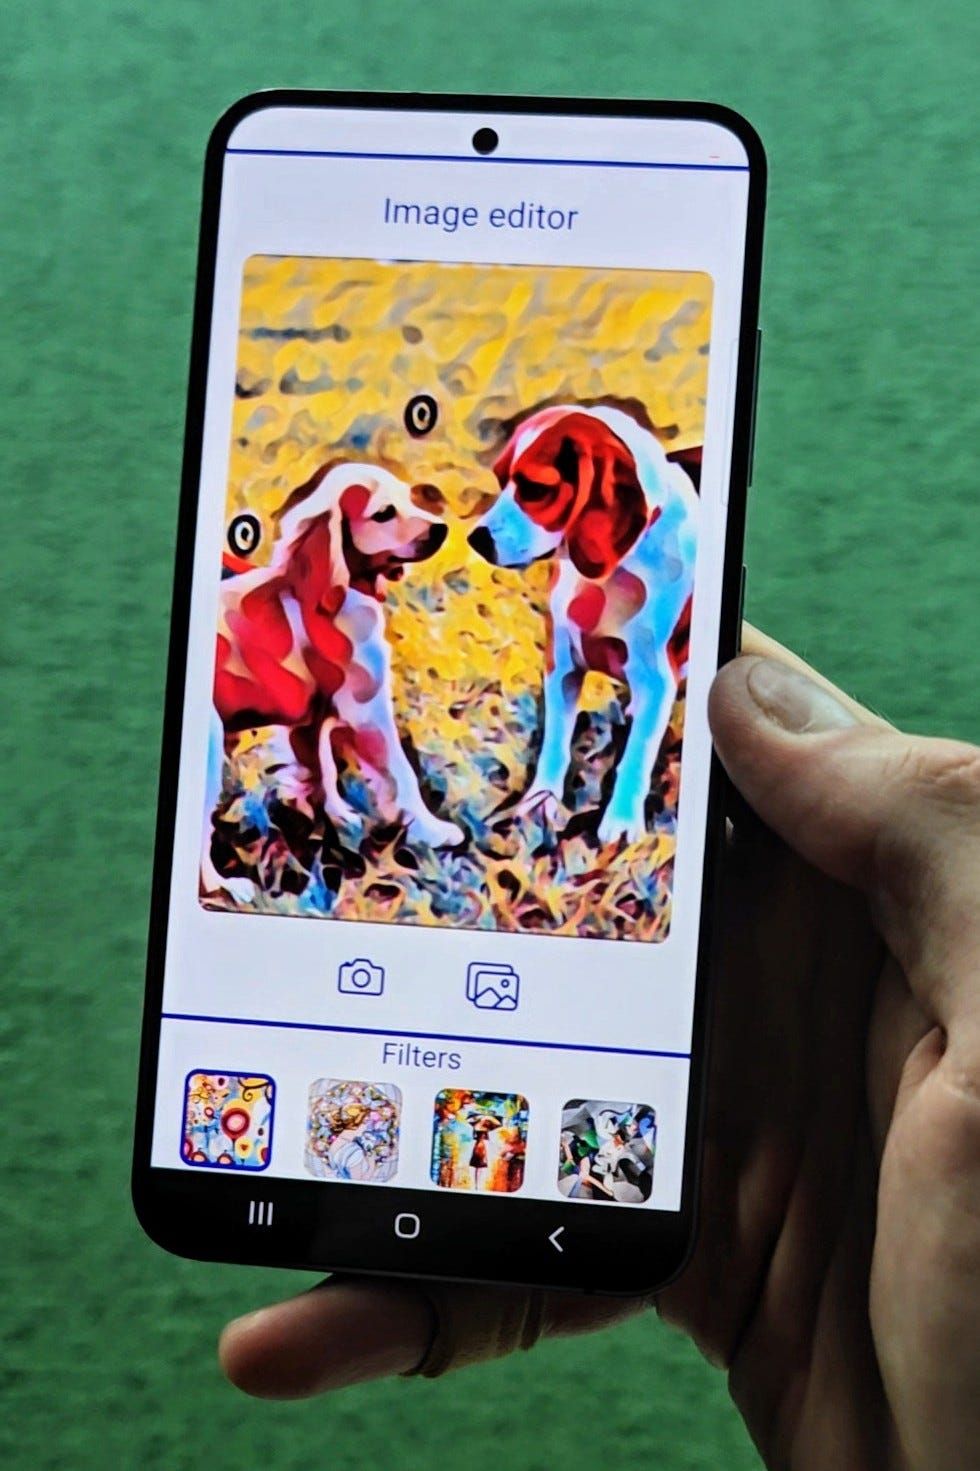
}That's it! We successfully deployed a style transfer model in React Native. Results of the model we worked with, should look like this:
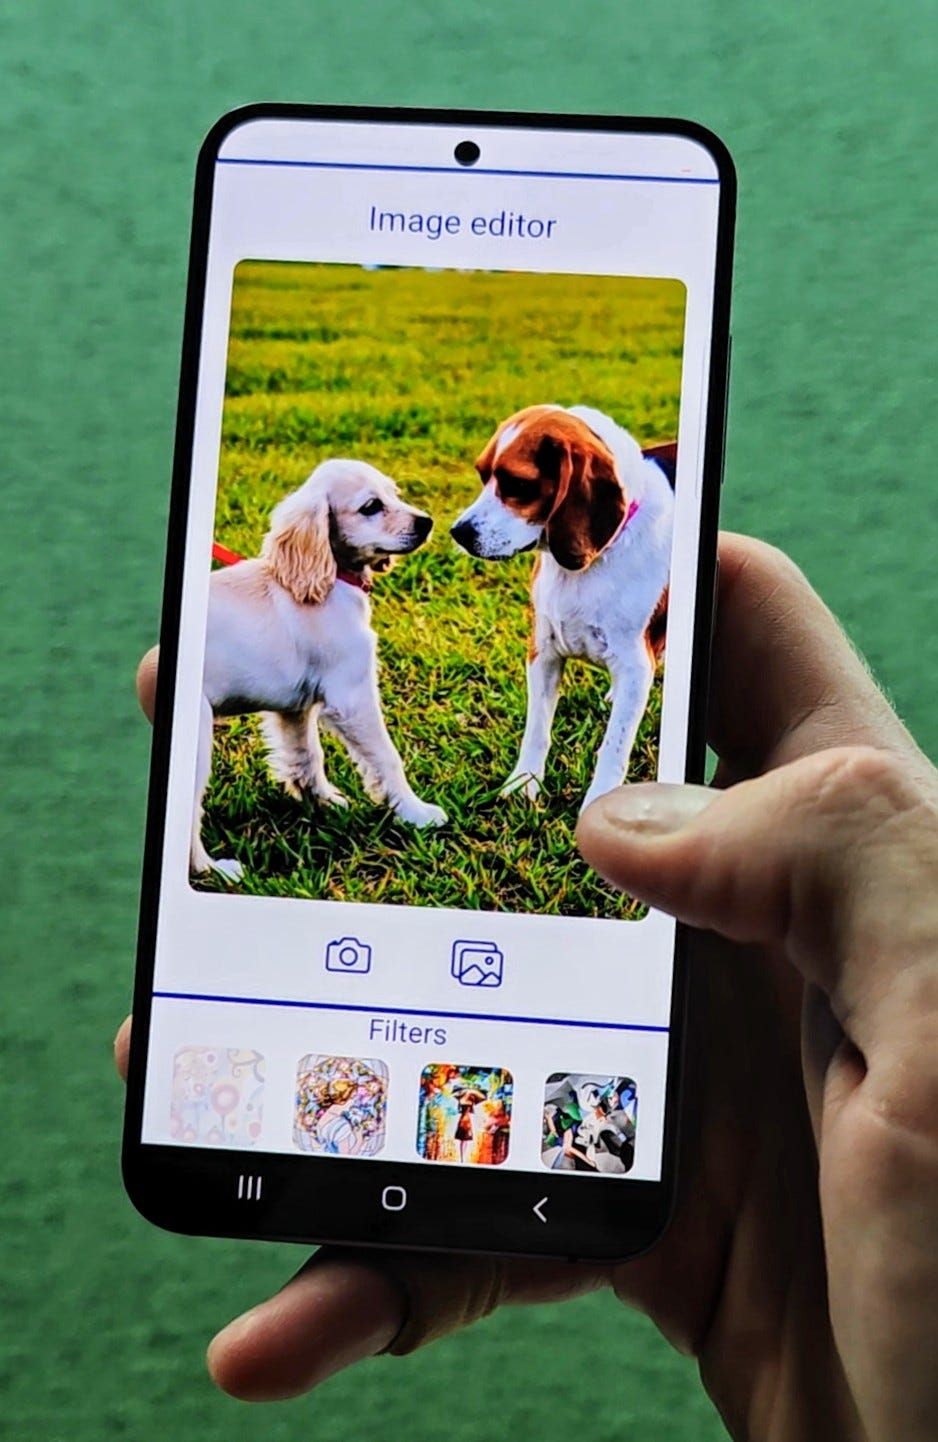
Be sure to check out the repository of our demo app!
GitHub - software-mansion-labs/executorch-style-transfer: Demo app for executorch style transfer… Demo app for executorch style transfer tutorial. Contribute to software-mansion-labs/executorch-style-transfer…github.com
We’re Software Mansion: software development consultants, AI explorers, multimedia experts, React Native core contributors, and community builders. Hire us: projects@swmansion.com.
Contact - Software Mansion Software Mansion S.A., a polish public joint stock company with its principal place of business at ul. Zabłocie 43b…swmansion.com